
Jim Welch says (12th November 2020) : "I have found a replacement thermostat which is much cheaper than the Honda replacement. the thermostat is from Eurocarparts.
Product code 20986001j it is normally fitted to Suzuki swift 1.3 1989 , it seems a very good fit."
Removing the radiator is only necessary when there is a fault with it or its cooling fan, or you are doing an 8,000 or 12,000 miles service and checking the valve clearances (tappets). Whilst it is possible to check and adjust the rear cylinder's tappets without removing the radiator, it is impossible to reach the front cylinder head valves with the radiator in place.
You don't need to remove the radiator just to change the coolant. If a coolant change is all that is required, just follow the instructions regarding draining and refilling the cooling system and ignore references to removing the unit.
Don't do anything until you have a litre of nonsilicate antifreeze - this is the pink "advanced formula" stuff, not the standard green or blue antifreeze - and a litre of distilled (battery) water. Mix them equally. Don't get it on your skin, it feels horribly greasy.
To refill the cooling system after a complete draining you will need 2.1 litres of this mixture.
 the
Red Fox says : "DO NOT USE STANDARD GREEN ANTIFREEZE
because the Deauville, like its great-uncle ancestor the CX500, has a
mechanical seal within the water pump, which keeps engine oil separate
from coolant. Ordinary antifreeze contains tiny silicate particles which
accelerate wear between the two ceramic faces of the mechanical seal,
causing premature failure. The CX's mech seal can be replaced - although
this is not a job for a beginner - but the Deauville's mech seal is integral
with the water
pump and in the case of failure, the entire water pump unit has to
be replaced."
David Fisher [8-Feb-09] adds "I am at the moment in the throes of a mini-service on my 650 V-X and the next job is to change the antifreeze, which I’ve done twice before. The first occasion was when I acquired the bike (5.5k miles) and as I recall, the coolant I drained off was green. I thought at the time that this was probably the original coolant but could of course be wrong. Anyway, in my “ignorance” I went to my local Honda dealer and bought some new antifreeze – it was blue but not being any the wiser I used it (it was the only one they stocked anyway) ... the label said that it was suitable for use in all engines including aluminium. On the next coolant change occasion I also used a “universal” antifreeze (blue).
However, since reading your guide I decided to do the job properly and get some non-silicate antifreeze – easier said than done – most Parts Shop people just give you a blank look when you ask for it. As luck would have it today I called in Tesco’s and whilst browsing the Car Care section I stumbled across a discontinued line of “Prestone” antifreeze which is nitrate and silicate free, long life (5yrs/150k miles) ..... Whoopee! But it’s yellow."
Malcolm Watton (12-Nov-16) says "Hi Rob, just to let you know I may have found the best Antifreeze for the Deauville and maybe others. It is called PERSTONE antifreeze and it can be brought at Tesco's, in store it costs £6.00 litre but if you order it through Tesco Direct it will cost £4.50 a litre, I think that is a good deal."
Huan
Tan (8-March-18) says "I'd like to add that coolant for Japanese
machinery is safe if it conforms to Japanese Industrial Standard(JIS K2234).
It means it is free of Amine, Silicate, Borates and Phosphates. There
are two broad groups of coolant in common usage and they are commonly
determined by colour which is incorrect, they can be any colour. The two
groups are determined by the prevalent water hardness of lack of in Europe
and Japan and the resulting reaction with the coolant. That's why there
are so many premixed coolants available now.
Honda Type 2 is recommended but Rockoil XL is also suitable as they both
conform to the JIS standard.I am sure there are plenty of others as well
but having done some research on the subject I have found the JIS standard
is an easy spec to look for and if a coolant doesn't have it it may be
safer not to use it long term in an aluminium engine."
So
... any colour you like is fine as long as it's the NON-SILICATE type.
Also be aware that antifreeze is significantly poisonous - don't try and syphon out, by mouth, your old coolant! It's especially fatal to animals, who may drink it due to the attractive scent and flavour. Dispose of old coolant via your local council tip, which will have facilities for this, as they do for used engine oil.
Ensure that the engine and cooling system are completely cold, or you may get seriously scalded by hot coolant.
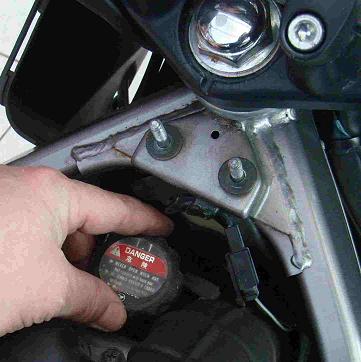
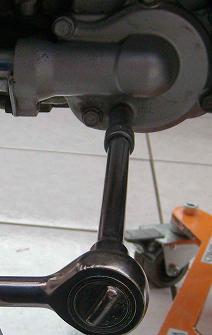
Locate the coolant drain plug on the water pump body on the lower left hand side of the engine.
Place your drain tray under this point and a little way outwards as the coolant will spurt out towards you.
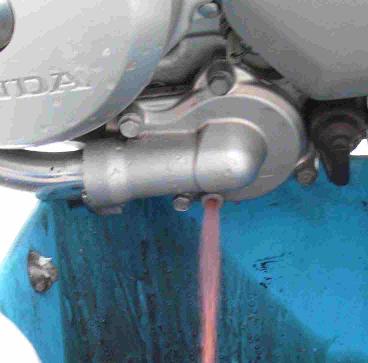
Remove the plug and allow the coolant to completely drain. Then replace the plug, tightening to 6 ft/lbs.
Note the correct pink colour of the liquid - this shows that the cooling system had been filled with the nonsilicate type of antifreeze.
Antifreeze by the way is flammable ..
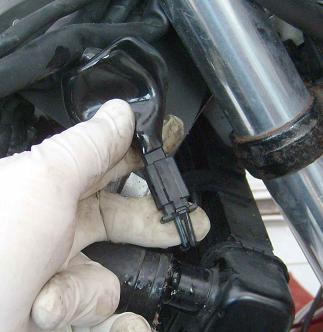
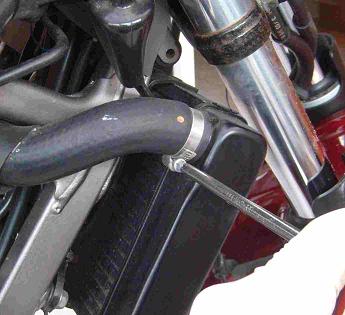
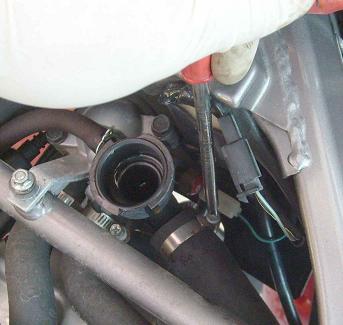
If you are doing a tappets check on the front cylinder, also remove the clamp at the other end of this hose, and remove the entire hose from the engine. But if you are just taking the radiator off you can leave this hose where it is.
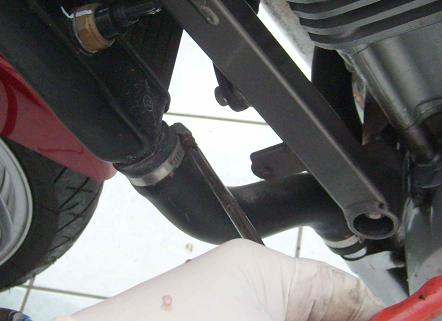
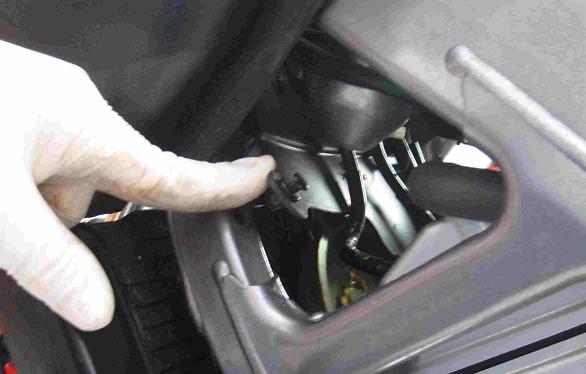
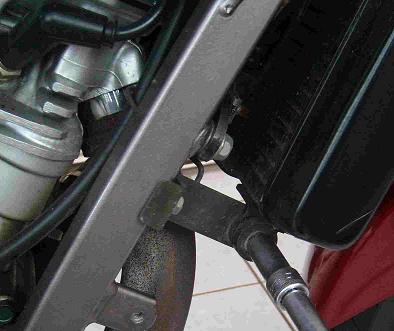
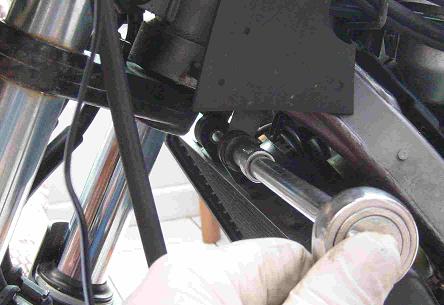
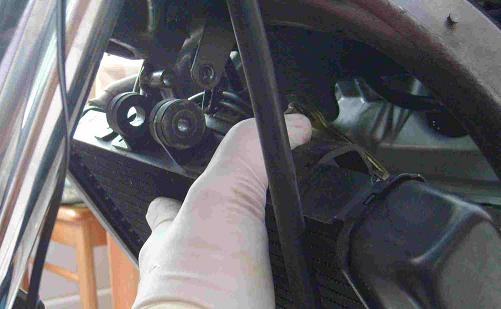
However, once the right hand bolt is out, you will see that the radiator mounting lug is slid over a stud, from left to right.
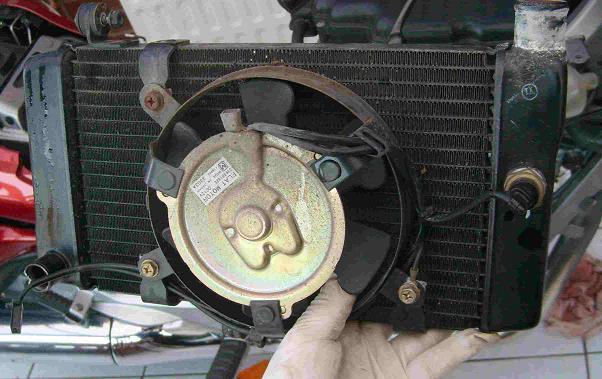
Ease the radiator out. In this picture I am holding it upside down to avoid any spillage.
Check the delicate fins for damage and remove any embedded debris such as insets or small stones. using a feeler gauge or something equally slim and flexible. Paul Van Der Merwe comments that it's a good idea to check the fan rotates smoothly, as it's possible for debris to become trapped between the blades and radiator, preventing the motor from being able to drive the fan.
Then use a hosepipe to reverse-flush the radiator from the bottom to the top hose junctions.
Clean any dirt or corrosion off the flanges where the hoses are attached.
There are no pitfalls with reassembly, but when locating the radiator back against its mounting points on the chassis, the bottom edge of the radiator body needs to slip behind the metal strut which goes across the front of the engine. Slide the radiator back from the left side, onto its top lug and don't tighten all the holding bolts until you are satisfied that the hoses marry up with the radiator.
The cable clamps (called Jubilee clips in the UK) often get corroded or rusty and this is a good time to change them.
As with all holding bolts, nuts and screws, a gentle squirt in ACF50 (not WD40) prevents corrosion and helps the next spannerman to get them out, hopefully not for a couple of years!
To refill the radiator, check the hose clamps are tight and using your 50/50 nonsilicate antifreeze and distilled water mix, fill from the top down until the radiator is full. After a short road test or static engine run, check the level again, and top up as required, checking carefully for any leaks or drips; tighten the hose clamps as necessary.
Don't forget to check the level in the plastic opaque coolant reservoir bottle as routine coolant top-ups are done here and not at the radiator cap. This bottle is accessed from the left hand side of the bike and is located between the engine rear casing and the swinging arm.
Bob Willemen makes a very good point : "I followed your instructions for the engine coolant's change , it was quite easy to do . But what about the coolant reservoir in front of the rear shock absorber ? I found the instructions in the Haynes manual, it told me to remove the shock absorber. Seemed a bit overkill for me so I pulled off the rubber hose at the bottom of the reservoir (accessible from below, right side of the bike). I use a cheap, battery powered 'head light' when servicing my Deau . With the coolant draining bolt, the radiator cap and the reservoir hose removed I flush the system with a garden hose via the radiator neck. Same action for the opaque plastic reservoir. Replace all hoses and bolts and fill her up with fresh coolant."
Bryan McCubbing adds : "With reference to your article regarding non nitrate and non silicate free coolant for the Red Fox, three years ago upon purchase of my 2000 model Deauville, I automatically replaced the oil and coolant. The coolant was purchased from the local Honda franchise and who sold me the Castrol green coloured coolant. When asked if it was free of nitrates and silicates the storeman replied that they sold no other coolant and that it was used on all Honda bikes in their workshop. My Deauville has 27,000 miles recorded and the coolant is still green but grotty so being changed. I contacted Castrol and their reply is below. I have now purchased, from the Yamaha franchise, Fuchs Silkolene Pro Cool coolant and which states that it contains no harmful silicates and with winter protection down to -34 degrees Celsius.
Bryan contacted the manufacturers : "Dear Sir/Madam, I have been using your motorcycle coolant which is pre made up and the container has the number P812041 on the front and P812043-01 on the rear as well as a bar code 8-005707-903700. I own a Honda Deauville NT 650 of 2000 vintage. I have been informed that I should be using a coolant that is nitrate and silicon free but containing ethylene glycol antifreeze. Does your standard green colour motorcycle coolant contain any percentages of nitrates or silicon?. If so, are you able to recommend a Castrol motorcycle coolant that I may use with safely in my aforementioned motorcycle?. Thanking you in advance, B.A. Mc Cubbing"
He received this reply : "Dear Mr McCubbing , Thank you for your e-mail. I can confirm that our Motorcycle Coolant is not, in fact, nitrite or silicate free, it is a standard anti-freeze. If you require a product that is free of these elements we will soon be able to offer Castrol Radicool SF, however this has not been introduced just yet, so unfortunately, for the time being, there is no Castrol product that satisfies your requirements. Apologies for any difficulties that this may cause you. Regards. Brian Utton, Automotive Technical Manager, Lubricants UK & Ireland"
To fit the aftermarket chrome radiator guard, unbolt the fan from the rear of the radiator, noting that one of the securing bolts serves as an earthing point for the fan motor. The chrome guard's arms come around the rear of the radiator body and are secured by the same bolts which attach the fan. Don't forget to reattach the fan's earth lead, ensuring that it is in contact with the metal of the radiator.
You are welcome to comment on these pages but you must manually remove the extra 'z' from the email address.