Park the bike on a firm level surface and turn the fuel tap inside the left hand side panel so that the pointer is horizontal, to turn off the fuel feed. Now start and idle the engine until it stops; this uses up any residual fuel in the piping, and will minimise spills when you disconnect the tank.
 the
Red Fox says : "As some petrol spillage is likely,
work in a well ventilated area and be absolutely certain that there is
no possibility of a naked flame or spark, as fuel vapour is highly flammable
or even explosive. When the tank is off, cover it with a towel to prevent
damage, and don't place it at the only exit route from your working space.
If there is a fire, you'll be trapped."
Remove the saddle as per the beginning section of the side pannier lid change page.
The right hand side panel pulls off from its rubber clips without any bother, but don't give it a huge tug as you might snap off the connectors - reach behind it and support its rear as you pull it away from the bodywork and chassis.

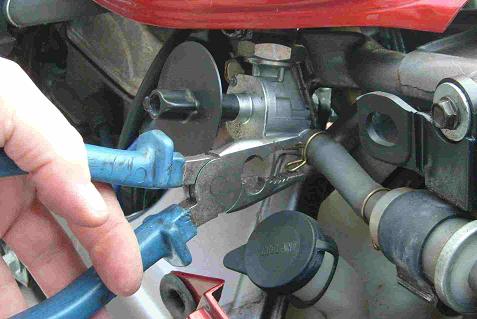
Note the fuel tap in the horizontal (OFF) position.
Use your pliers to detension the spring clip holding the fuel line to the fuel filter, and pull the hose off the tap, backwards. Some residual fuel may weep out at this stage from the pipe and filter, so be ready to catch any drips.
If you are unable to break free from nicotine whilst working on this job, you are likely to cause an explosion and fire, so have a nice funeral.
Remove the 12mm bolt which secures the rear of the tank to the chassis. After the tank is removed, put the bolt back in the hole, so you don't lose it.
The extra wiring visible here is a fused cigarette lighter accessory socket which I use for my Medion sat nav unit and for charging my mobile phone.
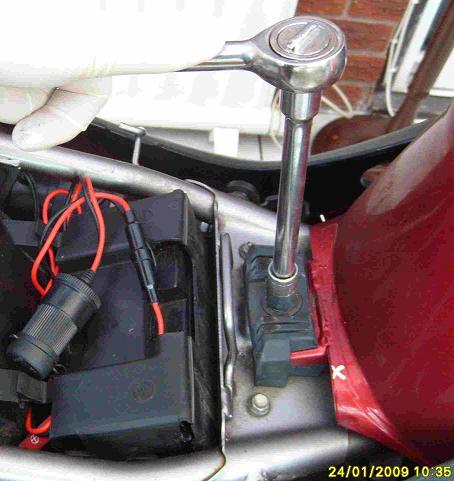
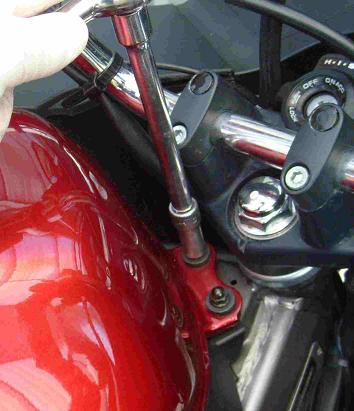
Remove the two 10mm dome nuts which secure the front of the tank to the chassis, just behind the headstock. Again, put them back on once the tank is removed.
John James says (15-Nov-20) "I managed to displace the front tank bracket rubber in the process. If you remove the steel insert, the rubber can be distorted and move into the oblong hole in the tank bracket. The thicker rubber portion should be at the bottom, to support the tank."
(This mounting point also serves to anchor the middle fairing section to the chassis.)
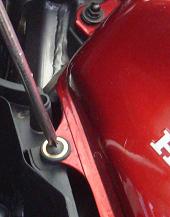
Inside each side pocket of the fairing is a crosshead screw holding the tank to the pocket edge.
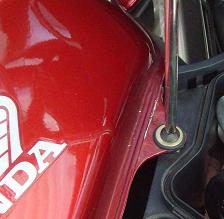
Remove both these screws and drop them into the pocket so you don't lose them.
Reach under the right rear of the tank and pull down and off the thick and thin rubber hoses, don't worry, these won't leak fuel.
On this picture I've shown them after the tank was removed, so you can see them better.
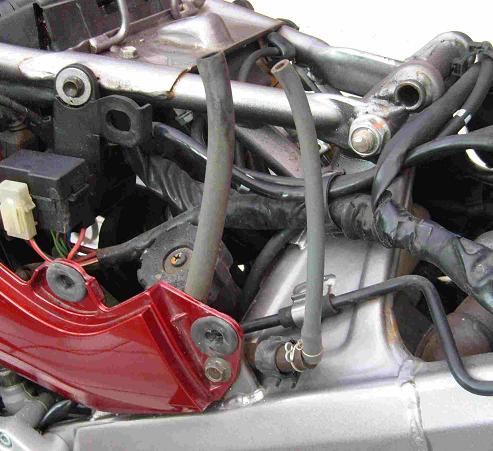
Stand alongside the bike and grip the tank by the front and rear bolt mounting points. Lift the tank up and back, be gentle just in case some wiring has snagged.
DO NOT PLACE THE FUEL TANK AT YOUR ONLY MEANS OF EXIT FROM YOUR WORKING SPACE! IF THERE IS A FIRE, YOU WILL BE TRAPPED. DON'T ASK ME HOW I KNOW.
Cover the tank with an old towel in case something gets dropped on it and damages the paintwork.
Repacement is a simple reversal of the removal procedure (don't we all love that expression).
You are welcome to comment on these pages but you must manually remove the extra 'z' from the email address.