Items required : the other set of pannier lids with their stiff plastic liners; crosshead screwdriver; 8mm socket, ratchet handle and extension bar.
If your other set of panniers are just the lids without any other parts, don't worry because you can reuse your original mounting screws, wire straps, lock loops and hinges. However you will need the inner black plastic rigid liners - you can't omit these.
After using my "fat" panniers on the Red Fox on several touring holidays, I can report that whilst the extra storage capacity is useful - you can easily get a helmet plus odds and ends in one - they are not as large inside as they look. This is due to the rigid plastic inner liners, which take up an inordinate amount of space. But the big panniers worked very well and are definitely worth fitting if you are into serious touring or just need extra general "lockable" space.
Note that the original V1 Deauville model (gold Brembo unlinked brakes, no chipped key) has different pannier lids with external hinges to subsequent variants (black Nissin linked brakes, chipped key) with internal hinges, and these types are not interchangeable. Details are further down the page.
If you need to buy spare parts, here are the details, Prices from David Silver's as at April 2009:-
INTERNAL TYPE Hinges : 77295-MBL-D00 "Hinge comp, saddle" (4 required @ £12.69 each) Link
Lock loop : 77249-MBL-D00 "Bar B, Saddlebag L" (4 required @ £2.84 each) Link
Lid securing screws : 93903-25280 (14 required @ £0.34 each) Link
Lock loop securing screws : 93903-25780 "Screw, tapping, 5x3" (8 required @ £0.37 each) Link
All nut and bolt sizes are quoted as the spanner size required to fit them.
Time : expert one hour, average 90 minutes, "first-time" 2 hours.
(Once assembled, the pannier lids are easily swapped over in a quarter of an hour)
All the hands, tools, and bike in the photos are the author's. In some of the photos I have had to wipe my hands clean before using the camera. I am very receptive to comments and suggestions, but you use these pages entirely at your own risk.
Whilst this lockable luggage space is very useful, many owners fit a rear carrier rack and top box for extra carrying capacity.
One point which is easily overlooked that after fitting "wide" lids to the 650, the bike's width is increased to 37 inches. Make sure that once your work is complete, your bike will fit through the shed door, garden gate, conservatory door - or - if you have a particularly understanding spouse / partner / parent - your front door!
My conservatory and shed have double doors, but the garden gate has to be carefully negotiated. (Incidentally - the BMW F800GT with the OEM panniers in place does not fit through the garden gate!)
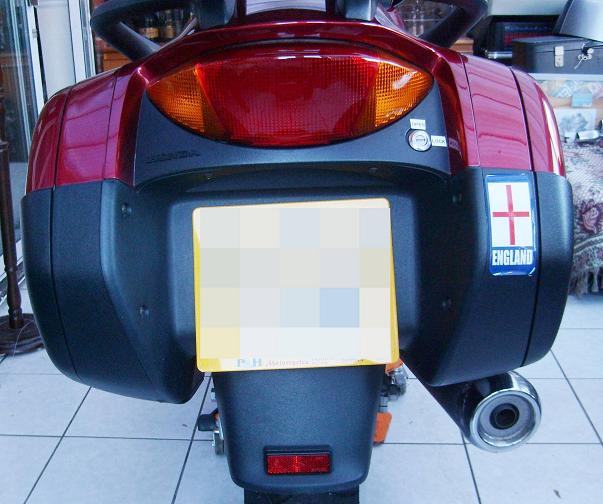
Honda however supplied as optional extras a pair of colour-matched "wide" or "fat" pannier lids which are a bolt-on replacement for the originals and which can be swapped back and forth as required. These wide lids offer a significant improvement to carrying capacity. On one camping trip I found that my sleeping bag could just about be persuaded to squash into one slim pannier, but went into the wide lidded version with room to spare. If like me you do any serious touring, the extra space is most welcome. The wide lids give a very "fat bottom" look as you will see.
My wide lids were unwanted items from a fellow owner and in the pictures they are in the original white. I did think about having a two tone Deauville because I won't be using the wide lids a great deal, now I've had them sprayed to match the bike's red colour. I've since acquired a second spare pair.
 the
Red Fox says : "BE AWARE that there are differences
between the early and late variants of the 650 Deauville. The V1 model
(gold-coloured Brembo calipers with unlinked brakes, headlight can
be turned off) has pannier lids which are identical in depth, and
have external hinges. Honda tweaked the design on the V2, V3 and V4 (black
Nissin calipers, linked brakes, headlight permanently on, chipped key)
models to internal hinges to stop corrosion and, more significantly, slightly
increased the depth of the left hand pannier, which did not need the shaped
cutaway to accommodate the exhaust silencer."
The sets of lids are therefore not interchangeable between early and late model 650s. As Honda have discontinued production of the lids, you will have to obtain them from another owner or from eBay. Be sure that you are buying the correct lids for your variant of the 650.
Naturally ... the 700 Deauville is different again!

This topmost section covers the more common V2, V3 and V4 variants of the NT650 Deauville, which has symmetrical panniers with internal hinges.
If you have the early V1 variant with asymmetrical panniers and internal hinges, skip down to the end section, as the instructions for these are a little different.
In the photos here, my 650 is in the conservatory on a castored bike trolley, which makes moving it about on the tiled floor extremely easy. I recommend these useful gadgets - I think mine came from M and P.
Park your bike on its centre stand on a firm surface. Turn off the ignition and fuel. Use the ignition key to unlock the saddle ...
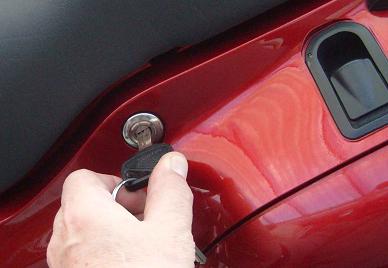
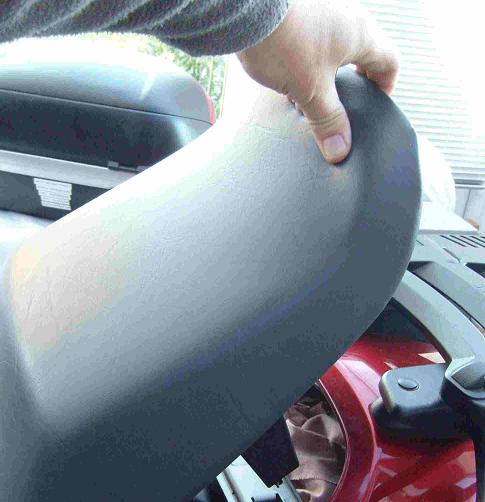
... and pull the saddle from the rear edge, up and back. It's a tight fit on its mounts and can require a hard tug. I only recommend removing the saddle because whilst it isn't strictly necessary, you may need access to the cable-activated pannier locks, which you otherwise can't reach.
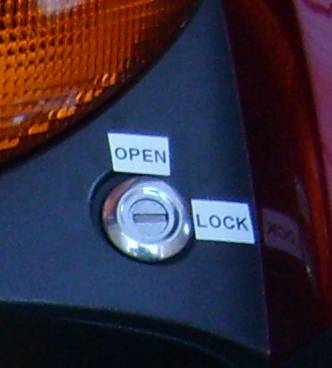
Unlock the panniers. This web page text will show you how to remove and replace the right hand pannier lid, but the left one is done the same way. Don't worry about mixing the lids as they have RH and LH moulded into their inner faces. However as with working with any set of paired components, it's always best to handle one side at a time.
Pull the right hand pannier release lever and let the lid open normally.
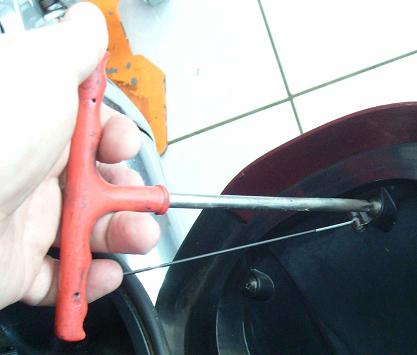
Remove the screw holding the wire strap to the pannier lid.
Remove the screw holding the internal end of the wire strap. This also holds one of the luggage straps inside the pannier body.
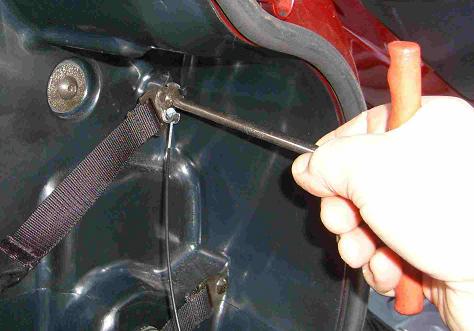

Using your 8mm socket, ratchet handle and short extension bar, remove the two rearmost dome nuts which fasten the lid to the pannier body.
Support the lid whilst you remove the front pair of dome nuts. Pull the lid away from the pannier body, don't drop it or you might scratch the paintwork.
Each pannier lid regardless of external colour comes with a stiff, quite thick skin lining in black plastic which screws to the inside of the lid itself, making the lid stronger and securing the hinges and locking loops. It is against this liner that the rubber weatherproofing edges of the pannier body locate, preventing rain and so on from getting in. It may be tempting to omit the liner to try and gain a little extra carrying space, but don't do this.

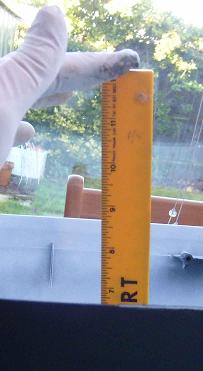
This is the depth of the standard 'slim' lids ... about 2 and 3/4 inches ..
 .
.
.. and this is the depth of the 'wide' lids ... about 8 inches!
Quite a difference.
If your other set of lids are complete with liners, hinges, lock loops and all the screws, skip down to here as you don't need to remove any parts from your original lids.
Place the lid with the painted face down and remove all the internal screws which secure the liner to the lid.
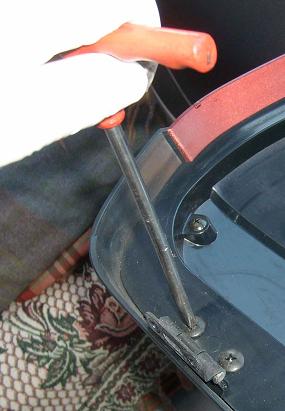
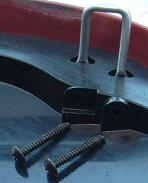
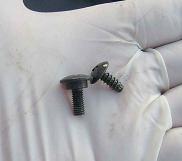
There are three types of screw; 4 long ones which secure the locking loops to the lid.
There are also 7 wide-thread screws - the right hand type shown in my palm - which attach the liner, and 4 machine-thread ones - the left hand type shown in my palm - which have a visible shoulder under their slightly wider heads.
With all the screws removed, pull out the liner, the pair of hinges from the bottom edge and the pair of locking loops from the top edge of the lid.
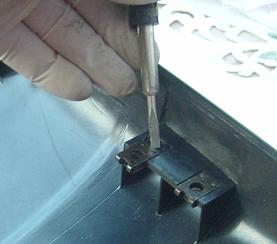
The hinge securing screws have metal u-shaped clips to provide a metal surface for their threads to engage. These clips are a simple push fit and can be gently levered off, but be careful not to snap the plastic lid shoulders on which they locate.
I recommend that you bag these all components together until you are ready to assemble the new lid. If you lose the u-clips, you can get them from Halford's.
One useful trick at this point is to use an indelible marker or ultra-violet security pen to scribe in your house number and post code on the inner face of the lids. This won't be visible when the liner is attached but is unlikely to be found by a thief.
Assembling and fitting the new lid
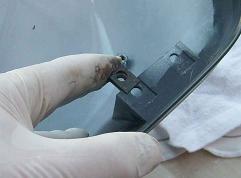
Position the new lid as you did the old one and push the u-clips onto the plastic shoulders.
 the
Red Fox says : "The orientation of the locking loops
and hinges is critical. If you get this wrong, you'll have to unfasten
the liner and move them until they are correctly positioned - or the lids
won't close, or won't lock, or both (don't ask me how I know)."
the
Red Fox says : "The orientation of the locking loops
and hinges is critical. If you get this wrong, you'll have to unfasten
the liner and move them until they are correctly positioned - or the lids
won't close, or won't lock, or both (don't ask me how I know)."
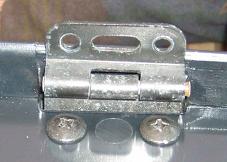
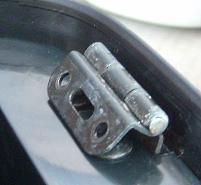
For the right hand side lid, this is how the forward hinge is orientated, here shown with the hinge extended. Each hinge sits with its flange between the liner and the lid.
This is how the rearmost hinge is located, here shown retracted. Note the direction of the metal as it is wrapped around the hinge pin. This gives you the visual reference you need to get it correct. They are both the same in this respect.
In fact if you get the hinges in the wrong way round, you won't be able to get the securing bolts in as all the holes won't line up. I suppose you could get it wrong if you tried really hard, but it is reasonably clear from a visual inspection that the hinges only attach one way.
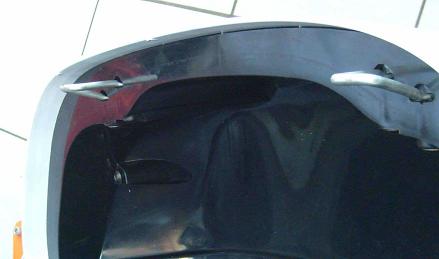
To get the locking loops correctly positioned, note how they "twist upwards" towards the middle of the lid, kind of following the line of the lid's edge.
They are simply pushed through the matching holes in the liner and locate between the liner and the lid itself..
Replace all the screws - 4 long ones for the locking loops, 4 wide-head shouldered machine-thread ones for the hinges, and 6 for the liner. Don't yet attach the 7th one where the securing wire strap will go.
Carry on from here if your replacement lids came fully equipped with hinges, liners and lock loops.
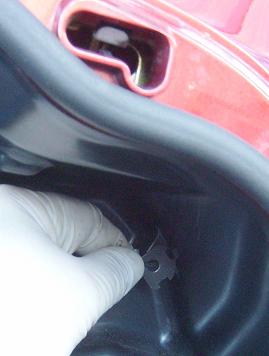
Offer the lid up to the pannier body and supporting it at one end, attach the hinges to the metal brackets at the bottom face of the pannier body. These brackets may get inadvertently pushed into the pannier space, they are easily pushed back again. Attach and tighten the 8mm head dome nuts.
Reattach the luggage strap and the internal end of the wire securing strap.
Steve Taylor adds : "With regard to changing pannier lids - from standard to large. If you are doing this so you can accommodate a full face helmet, then you will have to change the retaining wire strap too, if you use the standard one then the lids won't open far enough to get the helmet in. Mine has a length of high-tech string now!"
Now attach the external end of the wire strap to the 7th and last screw hole in the pannier lid.
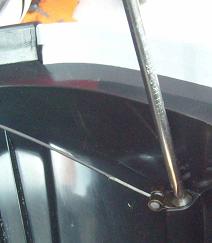
Finally gently close the new lid against the pannier body and - making sure that your keys are not in the pannier space - close and latch the lid, checking that the hinge action is smooth and the two locks engage fully. I have to slam mine shut quite hard to ensure that the lids are locked. If the lids close and lock correctly but the ignition key does not release the lid, activate the lock by manipulating the cable which runs under the saddle, then slacken off the hinge and locking loop retaining bolts. Offer the lid up again to the body and jiggle it until it locates correctly, then tighten the loosened screws.
It's worth dropping some ACF-50 on the hinges and locking mechanism, whilst you can reach it all.
If the lid just won't line up properly, you probably made a mistake when you assembled the liner, locking loops and hinges - double check them, also you can visually compare them with the other working lid.
Finally repeat this entire procedure with the other lid. But first ... a cuppa!

One thin and one wide pannier lid, for visual comparison.

I've had the white ones sprayed to match the red. Thanks to Jordan's Bodyshop of Unit C2, Castle Trading Estate, Holyhead Road, Priorslee, Telford TF2 9NP (07801 749 786) who did the excellent respray job for me. You can email them.

Finally, here are the sprayed and assembled wide pannier lids fitted to the Red Fox.
Start from here if you have the early V1 variant Deauville which has the symmetrical panniers with internal hinges.
Terry (Magic Man) kindly supplied the photos and instructions in this section. He says:-
"I have a 1999 Deauville NT650V. The one with the external hinges. I found changing the lids to be even easier than you predicted. This is mainly because the hinge has what I can only describe as 'locating pins'. Once the Pannier lid is 'constructed' as per your instructions, all one needs to do is:-
1) Unhook the pannier lid retaining wire from the old pannier, (one simple screw in the pannier lid)
2) Resting the pannier lid on your knee, remove the screws fastening the
hinge to the lid (it's easier than removing the screws from the body,
Be sure to save the screws AND the strap that sits over the two screw
holes.
3) Remove the old panniers.
4) Offer up the new pannier and rest it on your knee.
5) Put the 'locating pins' on each hinge into the new pannier
6) Ensuring the straps are in place lightly screw in one screw at one
end
7) Do the same with one screw at the other end
8) Put all remaining screws in place
9) Screw them all up tight
10) Replace the pannier lid retaining wire."

Pannier Hinges - Mounting points
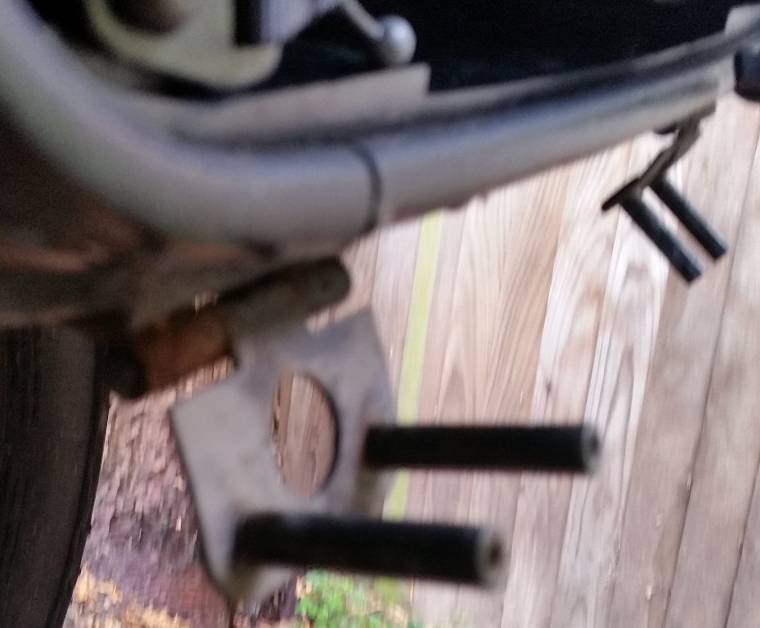
Close-up of hinge mounting points

Pannier underside
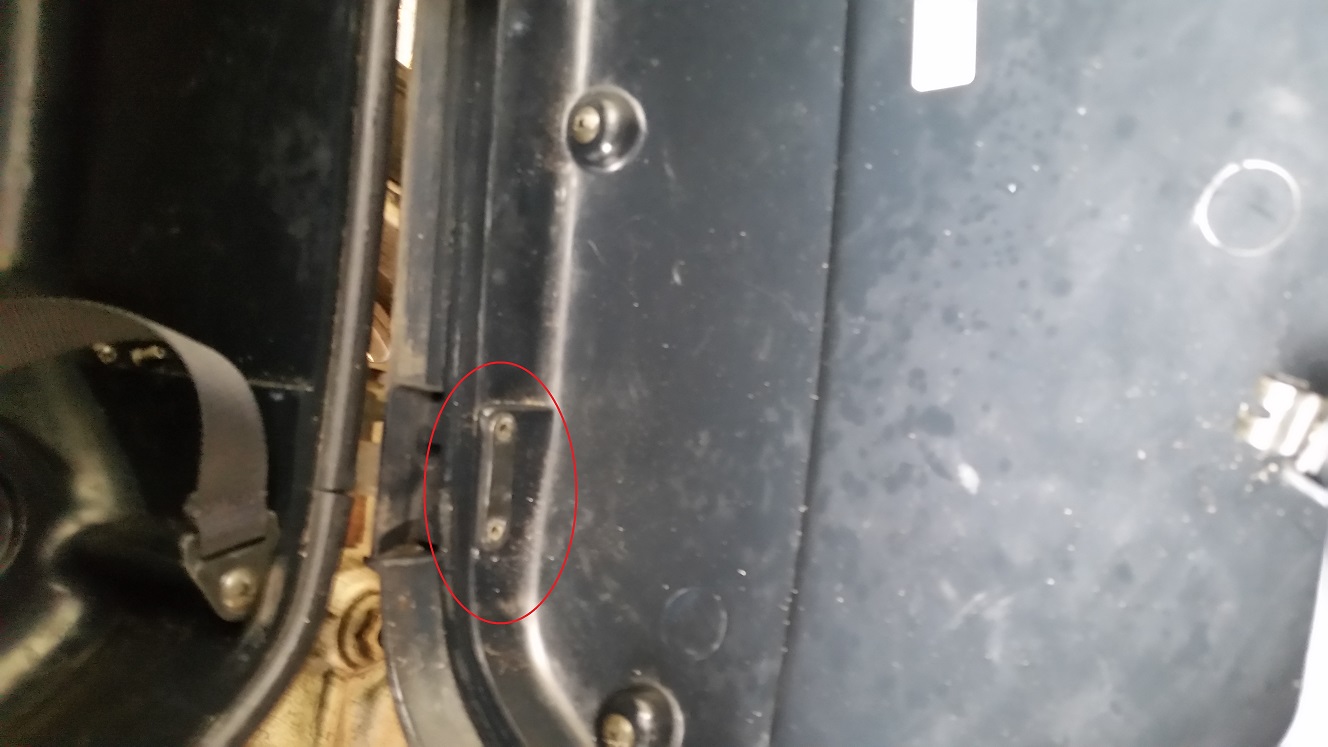
Left side view
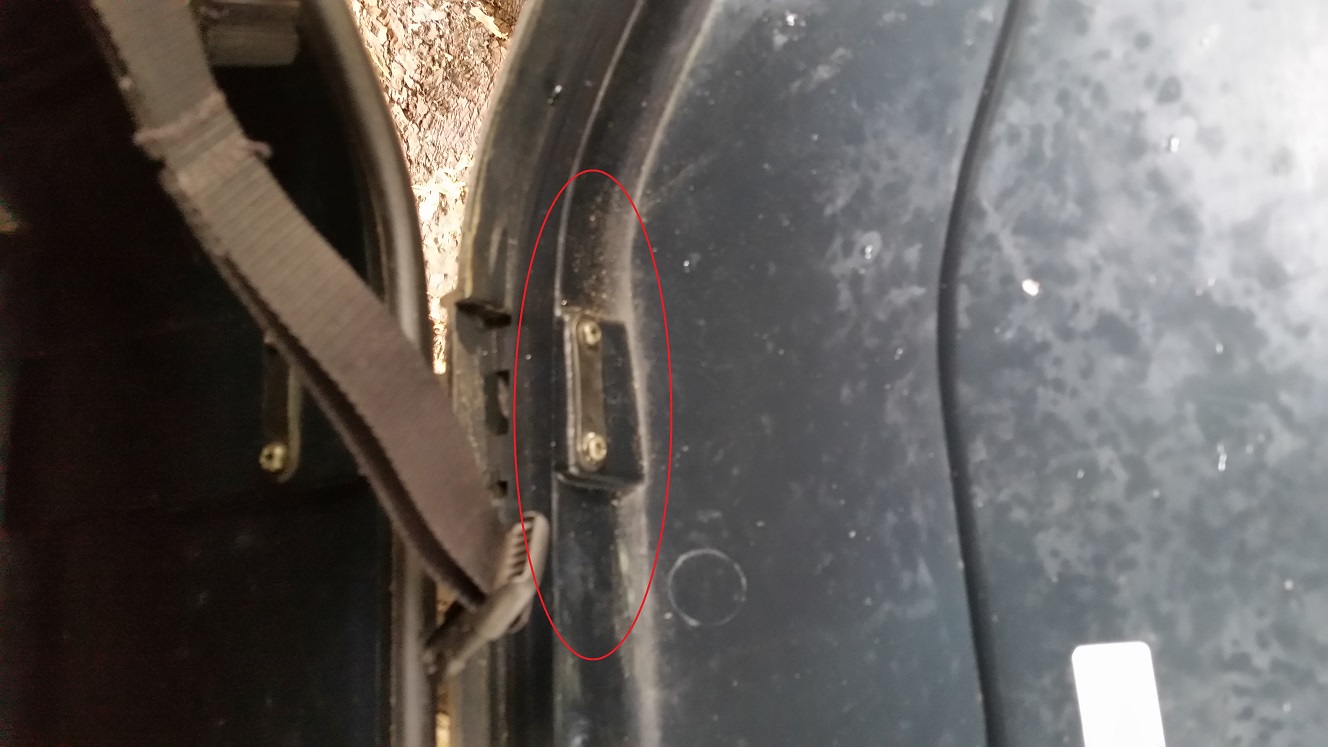
Right side view
"If the locking loops need any adjustment, this is achieved by loosening the screws that hold them in place, pulling them forward and retightening the screws.
Simples! I would say the Skill Level required for these is a 1.
Kindest Regards, Terry (Magic Man) "
Width measurements after fitting wide pannier lids
Handlebar-end-to end : 31 inches. Mirror edge-to-edge : 34 inches. Wide panniers : 37 inches.
With the wide pannier lids fitted on both sides, the rear width of the bike is three inches more than the mirrors and 6 inches more than the handlebar ends. If this makes you nervous about filtering through traffic, you can buy stick-on rubber strips which attach to the black lower sections of the pannier lids. These help to prevent scratch and brush-by damage.
You might also tape a short length of flexible plastic rod - perhaps a piece cut from a plastic coat hanger - along the handlebar grips and out by three or four inches each side. This would remind you of the Deauville's extra rear width. And, if these extensions fit through the gap, so will the rest of the bike!
I welcome comments and feedback, please remove the extra 'z' from the email address.