|
Remove the petrol tank. It is not necessary to remove the side fairings to work on the air filter or its box. The air filter is in three main parts. An upper lid, the filter element and the lower filter housing. It is not necessary to completely remove the air filter box to just change the air filter, so if that is all you intend to do, ignore the references to removing the lower section of the box. The air filter part number is 17210-MBL-D00 "Element, Air/C". The filter element is the paper type and cannot be cleaned or renovated, it must be replaced, complete in its black plastic surround. If you plan to remove the entire air filter box, undo the 8mm head nut which secures the front of the air filter to the subframe just behind and to the left of the steering headstock. If you are just changing the air filter element, you can leave this nut alone. |
 |
 |
Remove all the crosshead screws which secure the lid to the filter lower section. These screws are found on the perimeter of the air filter lid. |
|
Unclip and
disconnect the two horizontal rubber breather pipe hoses in the photo
opposite, and if you are planning to remove the lower airbox section
as well, also unclip and disconnect the lower hose, here seen with the
pliers on its securing spring clip.
|
 |
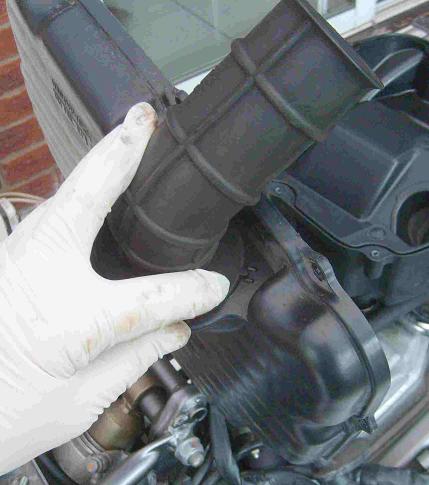 |
Lift off the air filter lid. The long "snout" air intake hose descends to the right of the steering head, down towards the radiator. |
|
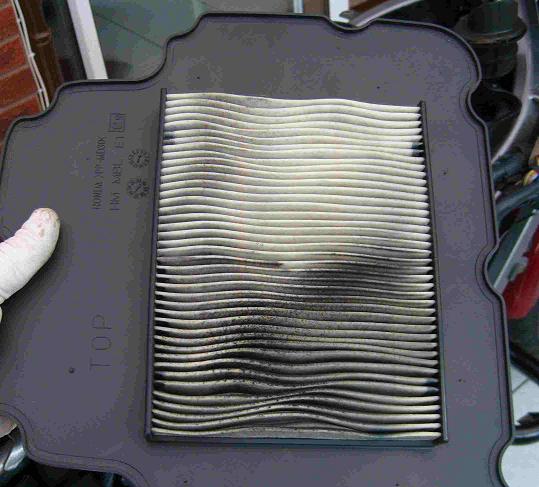
The air filter element then just lifts out. (It fits with the paper side upwards.) See on the old one here how dirty it is? The dirty section had been feeding the right hand carburettor, which had been running a little rich. Not surprising when you see how much dirt was ingrained in the paper, as this is where the air intake comes in and is the first place for dirt to collect. I am assuming that acculumated dirt is impeding the air flow, making the carb run a trifle rich. |
 |
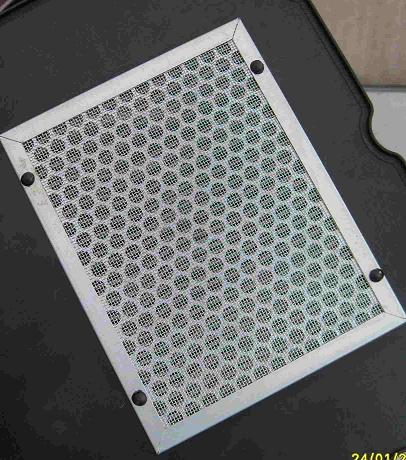 |
The underside of the filter includes a wire mesh. You can't disassemble the filter - it is replaced as a complete element.
It's not unusual to find traces of oil inside the bottom section of the air cleaner box. This is because oil mist is scavenged from the engine and fed back into the carburation system, reducing emissions. Wipe up any traces of oil before fitting the new air filter.
|
|
If you are just replacing the filter, discard the old one and insert the new one into the bottom section of the filter box, it only fits one way so you can't get it wrong. The paper ribbed part faces upwards and the mesh side faces downwards. Replace and screw down the lid, then reattach the two horizontal rear breather hoses. Carry on if you are going to remove the airbox bottom section. |
 |
 |
Slacken off the hose clip which secures the underside of the air box bottom section to the upturned mouth of the rear (right hand) carburettor. This one is easy to see.
|
|
The corresponding hose clip on the front (left hand) carburettor is less easily found. Sorry this photo doesn't show it very clearly but the line of the screwdriver should help you find it..
|
 |
 |
With the hose clips slackened off you can now pull off the air filter lower section. In this photo I have also disconnected the inlet tracts from the underside of the air box, just to clean everything, but you don't need to do this unless you wish to. Generally it's easier to pull the bottom box off with the tracts still in place on its underside. You may prefer to leave the intake tracts in place without loosening the hose clips, and just pull the air box bottom off the soft rubber tract mouths. It's up to you. When slotting them back into the underside of the airbox, use a smear of washing-up liquid as a lubricant. |
 |
|
|
Here is the air box assembly, complete with new air filter, so you can see how it re-assembles. Tony Brown adds : "The last pic in your air filter guide clearly shows a small rectangular foam sheet over the breather entries (bottom left of pic). Worth checking this is in place before you close up as it can easily drop out and get lost until you have put everything else back on and are just tidying up the floor before you go out for a well earned ride! I’ll remember next time!" Tezza the Grey adds : "Just
thought I'd add an observation for your very good resource page on
air filter change. The top and bottom parts of the airbox have a gasket
in them. These can sometimes stick to the filter and so be pulled
out from their location. The bottom one is no problem. The top, however,
may want to fall out as you refit it. This can be prevented by fitting
the new filter into the top whilst upside down, gripped by its edges
and turned over and fitted onto the bottom half." Don't forget to : -reconnect the three breather hoses; -tighten the inlet tract circlips; - and reattach the front tongue of the air box to the corresponding mounting stud on the subframe behind the steering head. Remember you can use two of the steel mesh grilles side by side as a radiator guard. You are welcome to comment on these pages but you must manually remove the extra 'z' from the email address. |
|
 the
Red Fox says : "Pick off the four plastic knobbles
and lift away this nice grille, because when you have two of them, place
them side by side short sides up, and you can easily fix them in place
to make a snazzy radiator grille!"
the
Red Fox says : "Pick off the four plastic knobbles
and lift away this nice grille, because when you have two of them, place
them side by side short sides up, and you can easily fix them in place
to make a snazzy radiator grille!" the
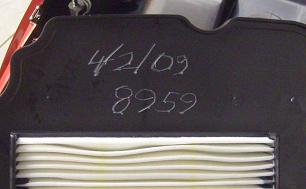
Red Fox says : "It's a good idea to scribe the date
and mileage on the new air filter, in case you forget when you did it.
This would also help any subsequent owners of your bike."