All nut and bolt sizes are given for the spanner size required to fit them.
Skill Level : 2. Dirty Level : 2. Work Mess Level : 1. Tools level : 2: Space required : 1
Tools required : 10mm, 12mm 14mm socket and ring spanners; T-handled screwdriver; torque wrench, ratchet handle and extension bar; pliers; a blob of grease. A rubber hammer would also be a good idea.
Parts required (prices as at February 2011):-
18231-MBL-600 JOINT EXH PIPE £10.13
18233-MBL-600 COLLAR EXH PIPE £13.17
18320-MBL-D00 PIPE FR EXHAUST £99.87
18391-MN-5650 PACKING MUFFLER £5.95
90208438000 NUT FLA CAP 8MM £2.12 (two required)
182931MN4920 GASKET EX PIPE £1.50
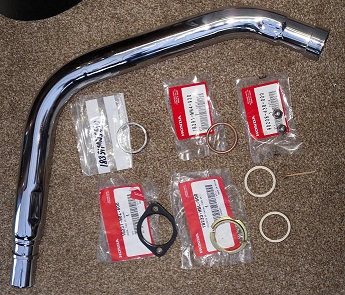
Time (after removing right hand side fairing and radiator): expert 30 minutes, average 45 minutes, "first-time" an hour.
All the hands, tools, and bike in the photos are the author's. In some of the photos I have had to wipe my hands clean before using the camera.
This page will show you how to remove and replace the front cylinder's exhaust pipe on your Deauville. On my bike the front exhaust pipe was badly corroded, as the previous owner hadn't fitted a front mud flap and hadn't kept the chrome very carefully. I hope to be able to have this corroded exhaust pipe rechromed, as a spare unit.
Removing and replacing the rear pipe is an extremely similar task.
If you have the NTV650, ignore the instruction to remove the right hand side fairing.
I am very receptive to comments and suggestions, but you use these pages entirely at your own risk.
Procedure
Park the bike on its centre (main) stand on a secure surface and turn off the ignition and fuel. Ensure the engine and exhaust system are cold.
It's been commented that you don't necessarily have to remove the right hand side fairing - the left hand one can stay in place (provided you can remove the radiator) or drain or remove the radiator, provided you can cope with working in a very tight space. But the job is much more simple and easy to get at if these parts are removed, and it's a good opportunity to replace the coolant if it's more than a year or so old.
Remove the two 14mm nuts securing the upper end of the exhaust pipe to the studs projecting down from the cylinder head.
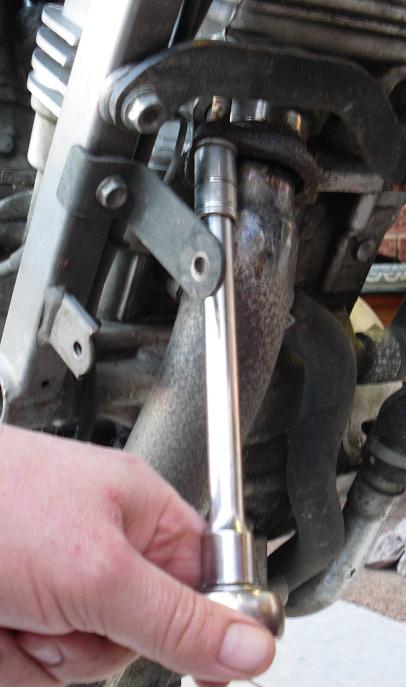
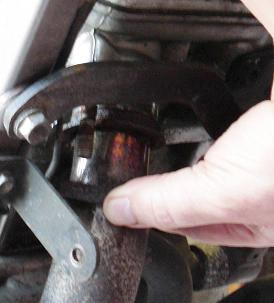
Pull down the thick black circular clamp ring and then the upper ring, which is not a complete circle.
Remove the upper short bolt which holds the exhaust heat shield in place against the collector box, which is where the two exhaust pipes meet and are merged together.
On my bike I've replaced the standard crosshead screws with stainless steel capscrews (often called Allen screws).
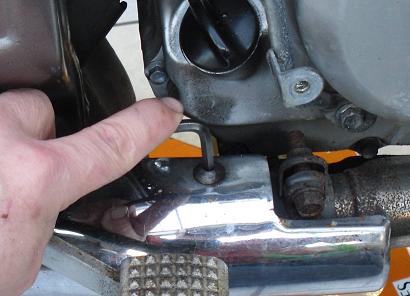
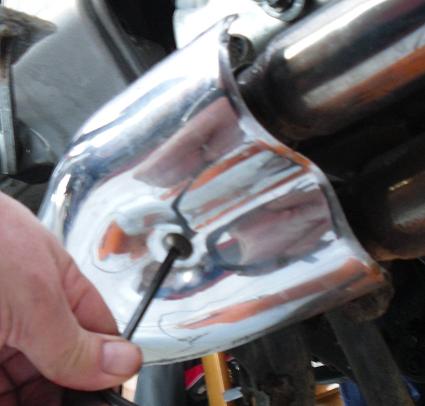
Pull off the heat shield. It's retained at the rear end by two rubber tongues which protrude from the leading edge of the silencer, and which engage with the rear end of the heat shield.
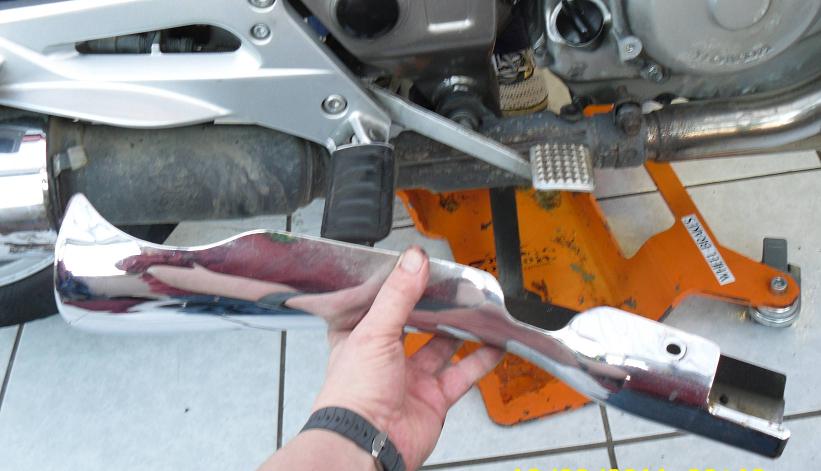
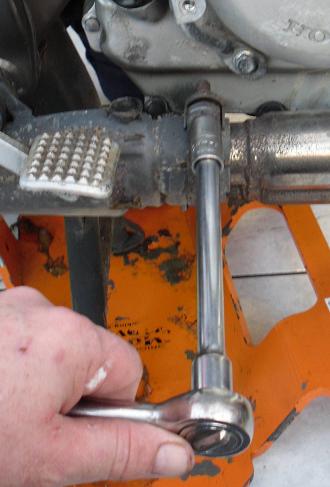
This is the tough part. Wriggle the exhaust pipe loose and ease the top end free of the exhaust port. When I did this I had to use considerable effort but eventually I was able to persuade the top of the exhaust pipe to come clear. Once it is out at the top, wriggle it away from the junction with the collector box. Use pliers to pull out the copper crush gasket which will be firmly embedded inside the exhaust port - you may have to use something sharp to dig it out, as it gets crushed (hence its name) between the port and the exhaust pipe itself. Also it's hard to spot as usually it's well covered in exhaust soot. But don't overlook it.
Use pliers or suchlike to pull out the remains of the sealing ring packing material which forms the seal between the bottom end of the exhaust pipe and the collector box.
Ensure that none of this material - it's quite thick - remains inside the throat of the collector, and then clean around the inner perimeter of the collector with a rag.
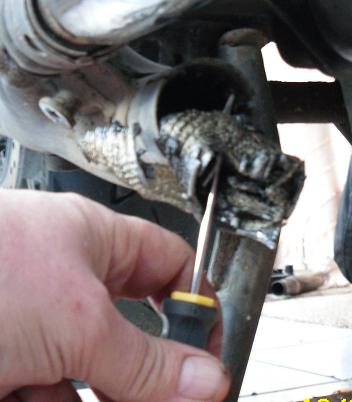
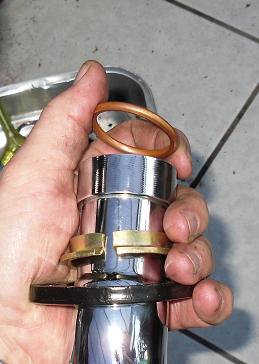
Order of reassembly at the top end.
Thick black collar clamp first; then the split collar, with the shoulder downwards. The copper crush gasket - alas, a smaller diameter one than for the CX500! - goes between the top of the pipe and the exhaust port. As the clamp is tightened, the exhaust pipe crushes the copper gasket, forming the topmost exhaust seal.
It helps to put a couple of blobs of grease on the crush gasket and then place it inside the exhaust port, this will keep it in place as the exhaust pipe is positioned and then clamped into place.
Order of assembly at the bottom end. The sealing ring looks strong, but it's actually quite fragile, so don't squash it. Slide it over the throat of the bottom of the exhaust pipe and carefully push it all the way along to the raised flange.
The clamp you loosened earlier on can go back on the collector box, but its securing nut and bolt should still be completely loose.
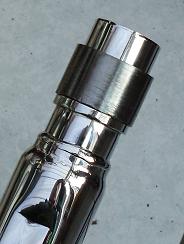
It's also a bit of a struggle to get the exhaust pipe back in again. Slide the bottom end of the pipe into the collector box, taking care not to damage the sealing ring. It may help to widen the throat of the collector with a tommy bar, by prising the 'ears' open a little - they have slots running backwards and can be very gently bent outwards.
With the bottom of the pipe inserted into the collector, ease the pipe's top end into the exhaust port. I had to use my rubber hammer to carefully knock the pipe right into the collector so as to give the top end of the pipe enough clearance to go right in. You should be able to see no more than 1/2 an inch of the pipe's thick flange collar not inserted into the port.
When the pipe is fully inserted, slide the upper collar up against the pipe's flange and the thick black clamp ring up as well, with the studs from the cylinder head protruding through the clamp's corresponding holes. Fit the two 14mm dome nuts and tighten alternately, working up to a maximum of 20 ft./lbs. Finally slide the lower clamp to the forward edge of the collector box, and tighten the clamp's nut to 14 ft/lbs.
Replace the radiator before an engine test.
On running the engine, listen for over-loud noise, suggesting a misaligned junction. A badly seated top pipe will sound extremely loud with a distinctive rop-pop noise. Feel for any exhaust leaks and tighten or adjust clamps as necessary.
Any small holes in the underside of the silencer are supposed to be there - these are water drain holes which allow any accumulated water to escape without rotting the exhaust system from the inside. So don't block off these small holes.
Replace the heat shield and fairing side. Here is the end result - a lovely shiny new front pipe!
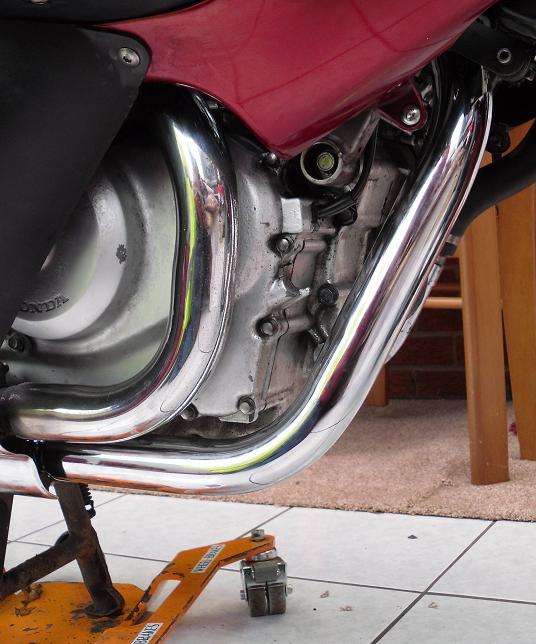
You're done! Comments are welcome via the Web Resouce main page.
Andrew Hallsworth
says : "When removing a front exhaust down pipe you say first
remove R/H fairing and drain/remove radiator.
I don't know about your model, but on my 1999 Deauville, there
was absolutely no need to do either and the whole thing was a 5 min
job even for a hopeless mechanic such as myself. Honda have deliberately
put a kink in the radiator mounting bracket to allow easy exhaust removal.
Without removing the fairing, simply do the following. Remove the shiny
heat shield covering the collector clamps, Slacken off the front pipe
collector clamp. Undo
the two exhaust nuts at the cylinder head using socket and extension
bar. Wiggle the exhaust forward until it meets the radiator bracket
and is free of the cylinder studs. Then rotate the exhaust clockwise,
whilst still connected to the collector box (the kink in the radiator
bracket allows the exhaust to rotate behind it). Once it is clear of
the bracket, simply pull it forward off the collector box. 5 minute
job."
He continues "I
put the new genuine Honda front pipe on in reverse of aforementioned
order without the need to remove faring/radiator.
Did find that I had to remove L/H fairing though, to change front near
side spark plug... what a farce!"