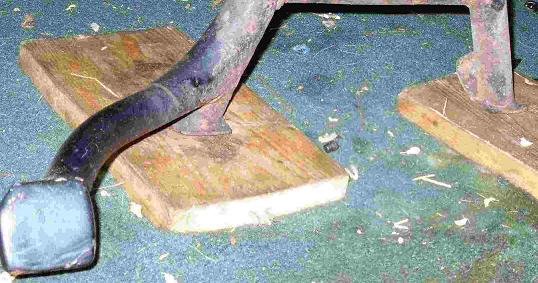
Park your Deau on its main stand on a firm surface and turn off the ignition and fuel. Use wooden blocks under each of the stand legs, to raise the rear of the bike slightly more than normal. This gives you more room to manoeuve the rear wheel as it comes out.
Ensure that the bike is balanced with its weight well forwards with the front wheel touching the ground; if necessary, add sufficient weight to the front to keep the centre of gravity over the handlebars. It is crucial that the Deau does not topple off the stand. If you are unsure, chock the front wheel to prevent any potential forward movement.
Remove the tyre valve cap and fully deflate the tyre, this is easier if you also remove the valve itself. It you are having a new tyre fitted, insist that a new valve is fitted.
Access to the rear wheel is greatly enhanced if you remove the rear number plate and the rear (black plastic) mudflap fairing which is located behind the number plate and between the panniers. This fairing is secured by 8 crosshead screws which attach to the panniers. It is not necessary to disturb any of the wiring or lights.
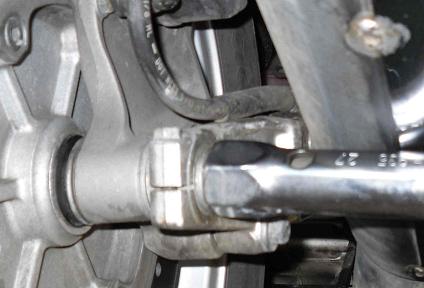
Attach a 27mm socket, ring or box spanner to the nut on the right hand end of the rear axle. Curiously, there is no split pin fitted here.
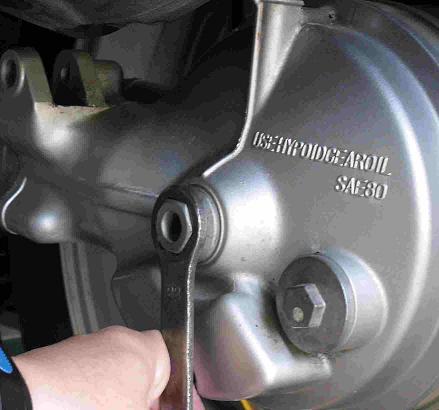
Prevent the left hand 22mm end of the axle from rotating as you loosen and remove the 27mm nut at the other end of the axle.
Or, secure the 27mm end and unscrew the 22mm end.
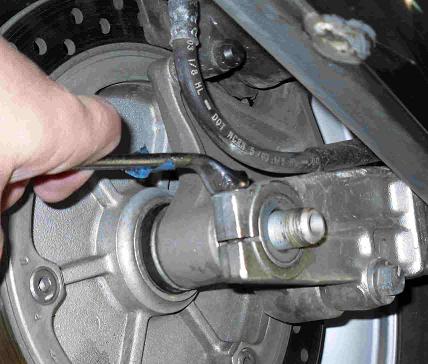
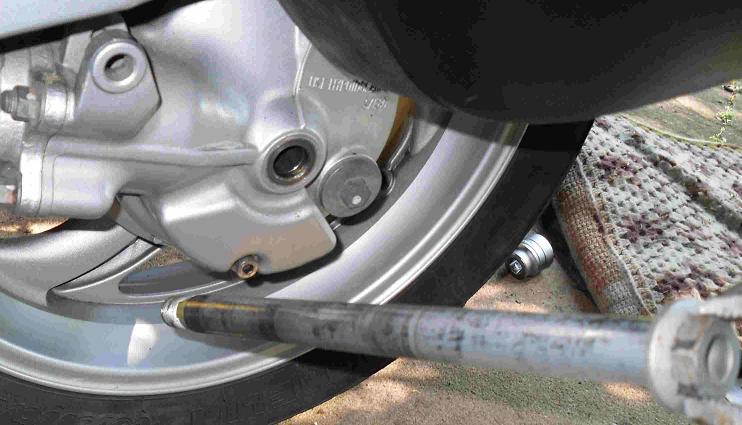
... and grab it with your pliers to pull it out.
Andrew Usher adds : "If you have an aftermarket exhaust fitted e.g. Motad SS, this sits lower on the bike and blocks access to the large nut on the rear axle, right side.''
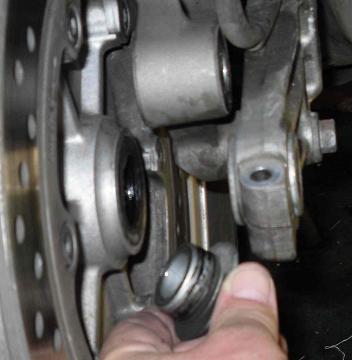
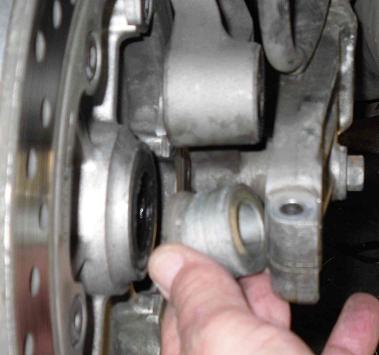
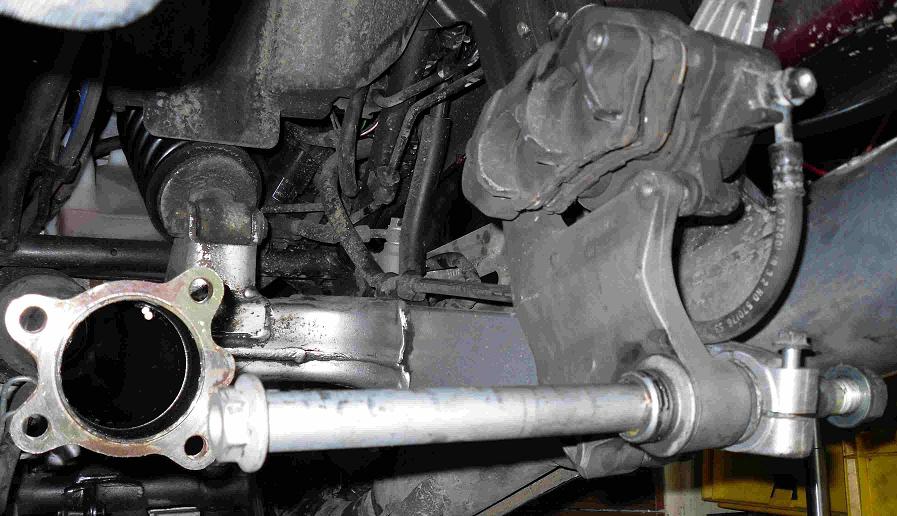
Having swung the caliper bracket as far upwards as possible so that the brake disc is clear of the disc pads, theoretically there should be enough clearance to extract the rear wheel by pulling it off towards the right, off the hub when it should drop clear.
One extra dodge at this point is to unscrew the number plate panel, which should allow extra clearance at the extreme rear. But if you are still struggling with extracting the rear wheel, because there still isn't enough clearance, unbolt the drive hub - this is no big deal - and the wheel will came out very easily.
Having done this job again in October 2014 I still recommend removing the drive hub, although access is definitely improved by removing the rear mudguard and number plate.
To take the hub off, remove the four 14mm nuts which attach the hub unit to the left hand end of the swinging arm. The inner top nut is quite hard to reach and required a lot of small movements with the spanner, to get it to come off.
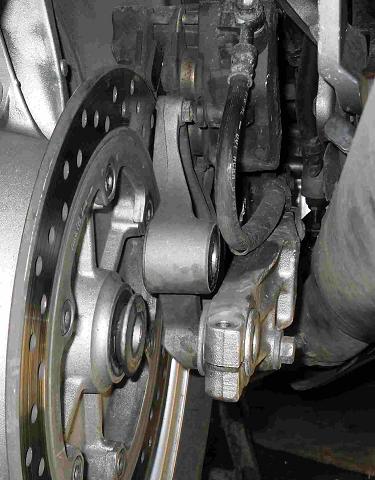
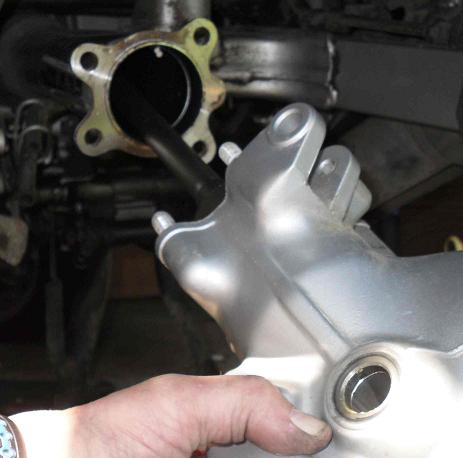
With the four nuts removed, the hub unit very easily pulls backwards and outwards, away from the rear wheel and bringing the shaft drive with it. There is nothing to leak out.
With this extra clearance, and with the tyre fully deflated, the rear wheel can be wriggled out to the left and backwards, past the inner side of the left hand pannier body.
This was actually quite a struggle and would have been easier if there had been more space under the rear wheel. If you can manage to park your Deau with its tail over a void - maybe the edge of a patio - or on a bike lift, you'll find this job MUCH easier.
(Notice that the swinging arm has a redundant mounting for a single-shock rear suspension unit, as presumably the same swinging arm was used on other Honda models.)
Before replacing the rear wheel, you might consider adding a small extra home-made mudflap, to keep road dirt off the suspension unit and the upper surfaces of the swinging arm. I used a 6" long portion of a clear plastic strip which is about 4½ inches wide - this was from a roll of industrial draught excluder curtain. You see it at warehouses and loading bays, keeping draughts out of working areas whilst still allowing people and vehicles through.
I pierced two small holes in the lower corners of the rear mudguard's bottom-most edges and pop-riveted the plastic shield in place. Spray the swinging arm and general uderside area with ACF50 to help stop corrosion.
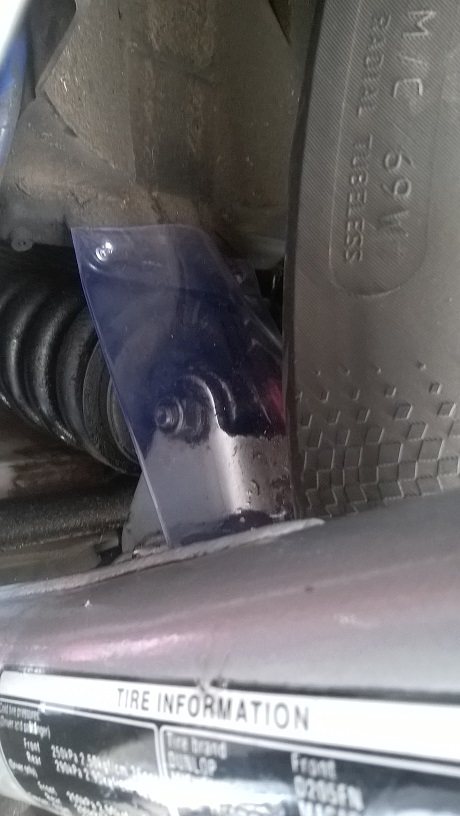
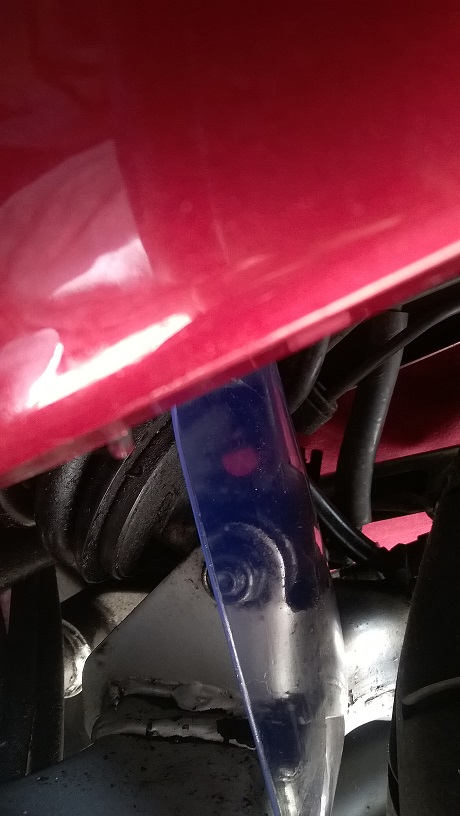
Temporarily replace the axle and caliper bracket, with its spacers - so you don't forget how they fit - and put all the nuts and bolts back where they came from. Clean the underside area, mudguard space etc. Don't get any cleaning agent on the caliper disc brake pads, and dry the disc thoroughly afterwards.
Be careful not to operate the rear brake, or the pads will close up and you'll have to lever them apart to get the disc back between them.
REPLACING THE REAR WHEEL
Whilst the rear wheel is removed it's a good opportunity to check the state of the rear disc pads and maybe fit new ones - at least, you should clean and wirebrush the caliper and its supporting bracket to remove any dirt or debris.
If you have had a new tyre fitted, remove any manufacturer's stickers. Clean the wheel rim and spokes as thoroughly as possible.
If you are working without a generous space under the rear wheel area, replacing it can again be quite a struggle. I am assuming here that you have removed the drive hub. First, raise the caliper bracket out of the way and fully deflate the tyre. Wriggle the wheel back into position, with the disc lined up with the space between the brake pads.
Generously grease the hub unit's splines on its inner face, and also on the rear wheel's corresponding splines. Slide the shaft into the swinging arm and ease the hub unit back into position, engaging the splines with the rear wheel. Put the engine into gear as this aids engaging the front end of the drive shaft with the gearbox.
This process is tricky as the rear wheel once engaged with the drive hub is a most awkward shape and rather heavy, so another pair of hands to support the weight will be a great help. As the drive shaft is fully inserted into the swinging arm you will probably have to gently rotate the rear wheel to and fro so that the splines at the front of the shaft engage with the gearbox.
One handy trick here is to reinflate the tyre, which raises the wheel and hub and more or less pushes it into the correct position as you tickle the drive hub's four bolts back into the end of the swinging arm, ensuring that the brake disc is still lined up with the gap between the caliper pads.
I had some trouble with doing this as I was on my own and it was a struggle lying on the floor, lifting the heavy wheel / hub and trying to get everything back into alignment, so be prepared for some cussing and swearing at this point. But once the four bolts are through the swinging arm and the 14mm nuts are started, the weight is supported by the bike and the whole job gets much easier.
Tighten the four nuts gradually, don't force this as it's possible that the front end of the shaft might not be engaged with the gearbox. If the nuts tighten fully, pulling the hub snug with its mounting, you are OK. If there is solid resistance, slack the nuts off and rotate the rear wheel to and fro engage the drive shaft, and try again. Tighten the four nuts to 48 ft/lbs.
I recommend replacing the rear axle from right to left as this improves access to the big securing nut, which then isn't partly obstructed by the silencer.
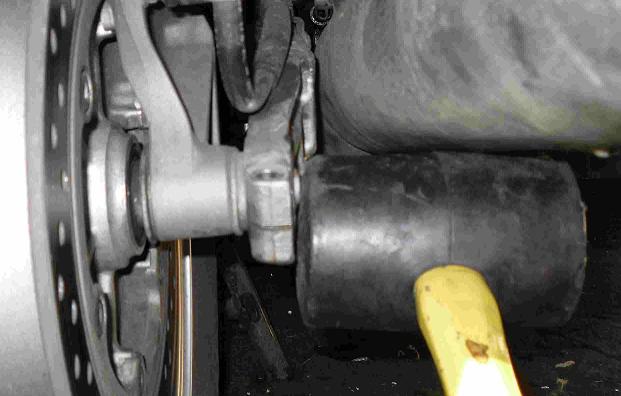
Replace the two spacers either side of the caliper bracket. Line up the axle hole in the wheel with the corresponding holes in the drive hub, brake caplier bracket and right hand end of the swinging arm. Grease the axle well and use a rubber hammer to knock it through from the right to the left, securing it with the large 27mm nut. Grease and replace the 12mm pinch bolt and tighten it to19 ft/lbs. Screw the caliper pivot bolt back in. Tighten the axle retaining nut to 65 ft/lbs.
With the bike in neutral, spin the wheel and there should no no grating or scraping sounds coming from any part of the mechanism, just the usual whir as the shaft, hub unit and gearbox work together.
Finally, pump the rear brake pedal to take up any slack in the brake action, and check that the brake light works. Spin the rear wheel to check for free rotation. Take the Deau off its centre stand and do a gentle rear brake test down your drive or pathway.
The first junction to come to on a ride is NOT the place you want to find that your rear brake doesn't work properly - and if you have had a new tyre, remember that for the first 100 miles or so it won't give you full grip, so don't push your luck on the corners!
Anthony Coles says : "Use a shovel under the wheel as a lever, to help lift it into the correct position."
Brian Vigurs adds : "No need for blocks. Remove rear number plate panel. Remove stopper bolt from calliper. Remove axle shaft nut. Loosen (no need to remove) 12mm clamp. Tap axle shaft through. Wriggle calliper bracket free of disc. Remove spacer from oil seal. Pull wheel away from cush drive and off. Even if a new tyre was going on I would not deflate it/ There’s no way I would remove the drive unit. The brake caliper stopper bolt can be a nightmare. Nice long ½ bar (not a ratchet) and a bit of heat WILL shift the b*****d."
Mick Bromage adds : "Hi, I removed and refitted my rear wheel today for new tyre fitting. I used your brilliant step by step guide and thought I would give you a couple of tips. No1 no need for blocks or to deflate tyre, I just undid the rear caliper stopper bolt so when the axle was removed I was able to move the caliper out of the way and just slide the wheel out . No 2 to enable me to refit the rear wheel on my own with no help, I simply jacked the front of the bike up as if I was removing the front wheel, in doing this the rear of the bike was lowered far enough to enable me to line everything up and slide the axle through with out having to lift the wheel and manouever it at the same time. Hope this is of some help."
Yes, but be careful if using this trick to jack the front wheel, because if you raise it too far the bike could be taken past its point of balance and the main stand will retract, dropping the bike and potentially causing serious damage or injury. Also, the caliper stopper bolt is notoriously tough to extract once unscrewed, and if it won't come out, you can't get the brake caliper clear and working space is severely restricted.
One mine the spline one was badly chewed up and not doing its job"