|
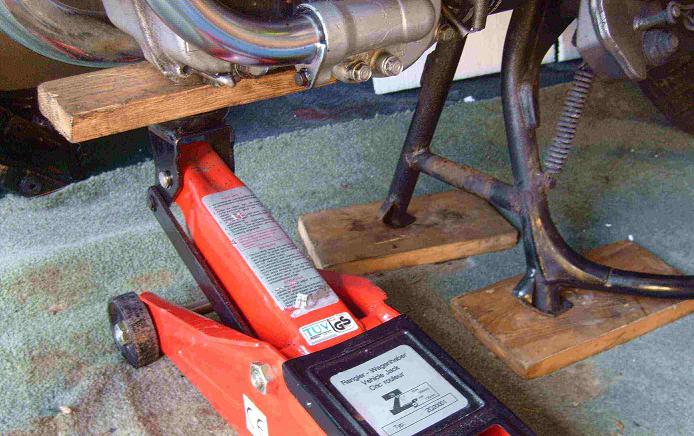
Park your Deau on its main stand on a firm surface and turn off the ignition and fuel. Use your car jack under the front engine casing to raise the front wheel clear of the ground. Note the wooden block between the jack's lifting plate and the engine, to protect the engine against possible damage as the jack is raised. I found it advantageous to artificially raise the bike slightly to give more clearance under the front wheel. To do this, place wooden blocks under the feet of the centre stand. This does give you more room to manoeuvre the front wheel when it finally comes out. It's also quite a good idea to place an axle stand, or other solid object, under the engine casing in case your jack fails whilst the wheel is out. If the jack fails and there is nothing to support the bike, it will roll forward off the stand and then fall over - a potentially expensive mishap. Especially do this if the wheel is absent for several days having a new tyre supplied and fitted, and your bike is left unattended. |
 |
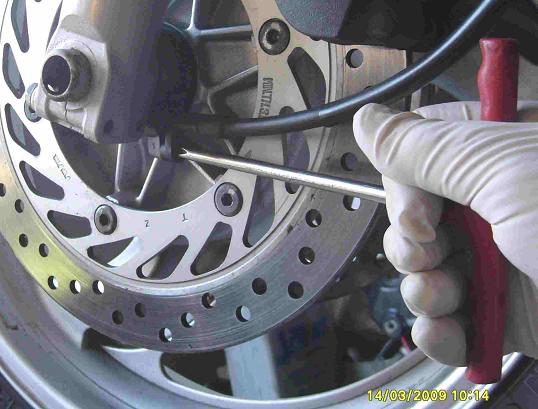 |
Remove the small black crosshead screw which retains the speedo drive cable into the speedo drive unit on the left hand wheel hub. Pull the drive cable away from the hub. Don't worry if the inner flexible cable slips out, but don't lose it. If you have a really old speedo cable, this is a good time to change it, if only the inner one, as you can swap the inner cable very easily, without having to fish about inside the fairing or instrument panel area to undo the outer cable. |
|
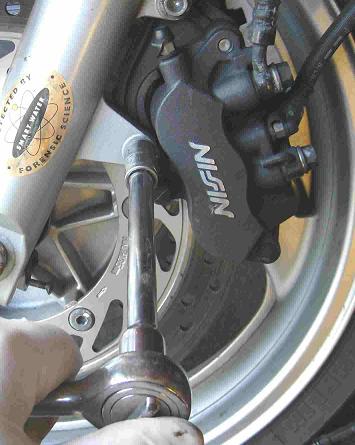
Both front brake calipers need to be unbolted from the fork legs, but it is not necessary to disturb any of the hydraulic hoses. The front wheel is too wide to pass between the caliper bodies unless these are unbolted. Each caliper is bolted on to the fork leg with two 12mm bolts. Remove two from the left caliper and two from the right caliper. In the photo opposite I am removing the lower bolt on the left hand caliper. The upper bolt is at the top centre edge of the photo. |
 |
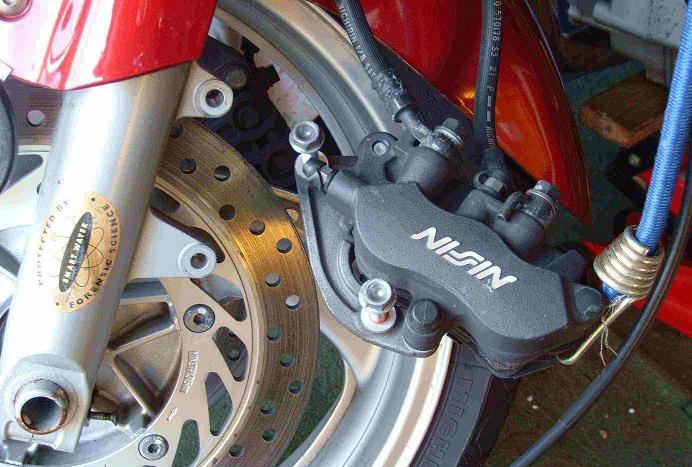 |
As each caliper is pulled away from the fork leg, replace the bolts (so you don't lose them) and support the caliper on a bungee strap, or length of rope, to avoid adverse weight being applied to the hydraulic hoses, which are not meant to take that type of strain.
|
|
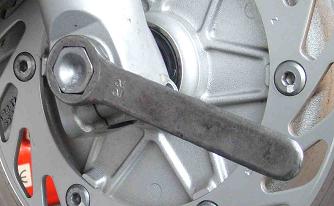
At
the front bottom of each fork leg is a pair of 12mm bolts, which pinch
the fork leg tight to trap the axle in place. Remove all four of these
bolts.
|
 |
 |
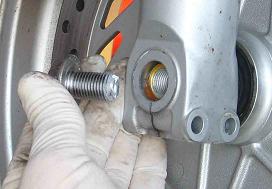
At
the bottom outer face of the right hand fork leg is a 22mm bolt which
retains the axle in the forks. Undo this big bolt ...
|
|
...
and pull it out.
|
 |
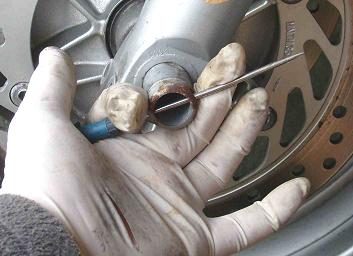 |
Slide a slim tommy bar or screwdriver through the eyes on the left hand end of the axle and wriggle the axle towards you and then completely out from the fork legs. It doesn't physically unscrew from anything, it's a push fit. The front wheel should drop down out of the forks as the axle comes clear. |
|
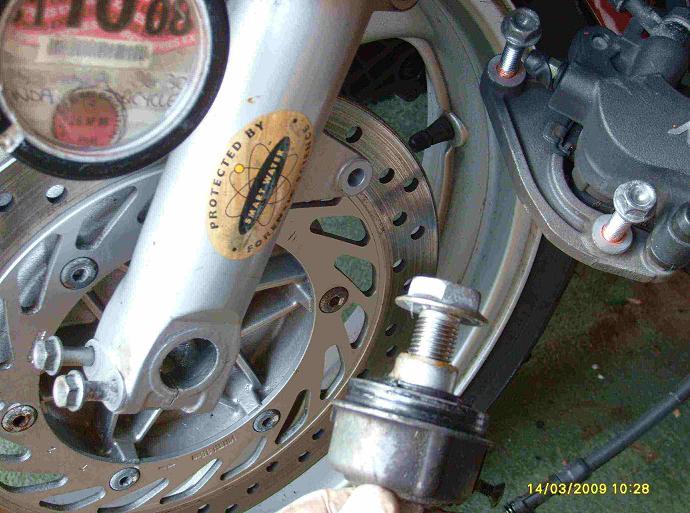
Catch the speedo drive hub! The front wheel now has nothing to retain it in place, and is pulled out forwards. If you find it too awkward or heavy to lift, just roll it, don't strain your back. |
 |
 |
Pending the wheel coming back with a new tyre, replace all nuts and bolts where they came from. Don't leave them lying around, they're all too easy to get mislaid. Now is a good time to wirebrush them clean, ready for reassembly. |
|
Replacing
the wheel
|
|
|
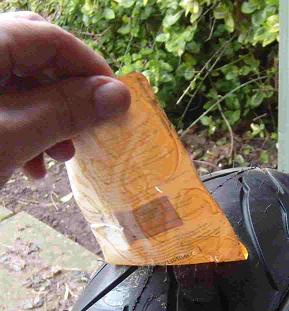
If your wheel had a new tyre fitted, peel off the manufacturer's label. I use Continental tyres - simply because I have come to trust them. I've used them on all the bikes I've had. They've never let me down, and wear better than anything else. |
 |
 |
Clean
the wheel and all around under the front mudguard and fork legs. Don't
get any cleaning agent on the caliper disc brake pads, and dry the discs
thoroughly afterwards.
|
|
Don't lose the large thick spacer ring or collar, which sits in the right hand hub of the wheel. This ensures that the wheel locates centrally after the axle is inserted. Be sure to fit the spacer so that its ridged end faces outwards. Brian Vigurs adds "smear a little grease on the OD of the thick spacer ring or collar before re-assembly." |
 |
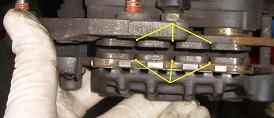 |
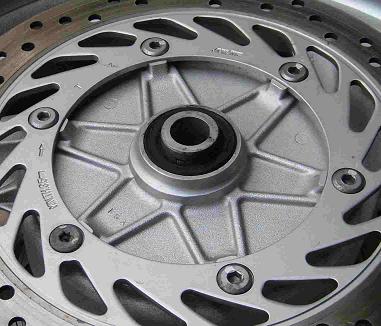
Whilst the calipers are off, wirebrush off any accumulated debris, and check the thickness of the discs. If they are less than 5mm they will need to be replaced. This is unlikely to occur except at high mileages, although it does depend a lot on riding style. Examine the disc pad thicknesses and replace them if the three wear grooves (arrowed in yellow) are not visible. If you need to change the pads, this task is covered here. |
|
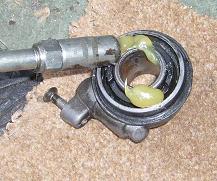
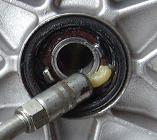
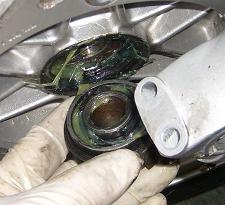
Grease
the speedo drive unit ...
|
 |
 |
...
and its corresponding location in the left hand hub of the wheel. Leave
the metal tabs visible!
|
|
The
drive unit locates into the wheel hub so that the tabs in the above
picture align with the corresponding indents in the drive hub. After
inserting the speedo drive, gently rotate it within the wheel and check
that the metal tongue which drives the bottom end of the speedo cable
is rotating with the movement of the hub. If the tongue is rotating,
the drive is correctly located in the wheel hub. In fact if it's not
correct, it's rather visibly wrong, and not square to the wheel hub.
|
T
 |
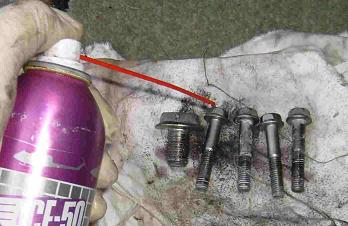 |
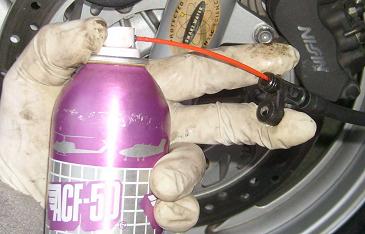
Squirt
a dose of ACF-50 onto the various bolts so that they don't corrode,
and will come out easily next time you need to remove them.
|
|
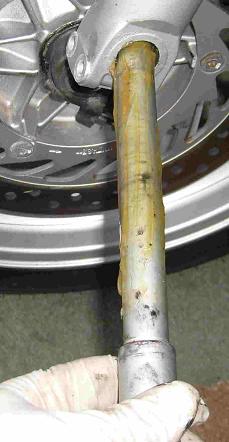
Grease
the axle and insert it just far enough to stay in the left hand fork
leg bottom. Don't push it so far in that the tip of it protrudes beyond
the inner face of the fork leg.
|
 |
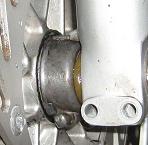 |
You CAN get the front wheel back in on your own but it's much easier to recruit another pair of hands. Ensuring that the speedo drive hub doesn't slip out, insert the front wheel between the fork legs and raise it to align the hub with the axle. Then tap the axle all the way through from the left hand side, right through to the other fork leg and out of the other side, as far as it will go. Anthony Coles says : "Use a shovel under the wheel as a lever, to help lift it into the correct position." In this photo, the speedo drive hub is deliberately positioned incorrectly, so you can see how it doesn't go. Check that your speedo drive hub is located so that the tongue on the inner face of the fork leg is IN FRONT of the corresponding tab in the top of the drive hub. If it isn't, rotate the drive hub so that it is. Wipe off any surplus grease which squirts out - you don't want this to spill or drip onto the braking system! |
|
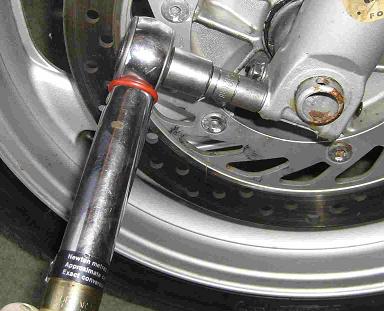
Replace the four 12mm fork leg bottom pinch bolts and tighten each one to 16 ft/lbs. Double check them after the first go, as they will need several tightening actions. Replace the 22mm axle retaining nut on the right hand axle end, and torque to 43 ft/lbs. |
 |
 |
Pull
out the inner speedo drive cable and squirt some ACF-50 down the cable.
Then push the inner cable back in and twiddle it so the top end of it
engages with the speedometer on the dashboard, you'll feel this as it
engages. When this is correctly located, the tip of the speedo inner
cable is flush with the bottom of the outer cable.
|
|
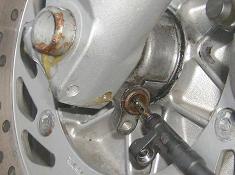
Note how the tongue on the speedo drive hub is orientated and align the bottom of the cable so that when you push the cable into the hub it goes all the way in. If it's wrong, you won't be able to insert the holding screw, so it's obvious when it's correctly aligned. In the photo opposite I've just pulled the inner cable a little way out so you can see how the tongue engages with the inner cable end. When it's right, replace the black holding screw through the collar at the cable bottom end and into the drive hub. |
 |
|
Offer the left hand caliper up to its mounting bracket and slip the disc between the brake pads. Replace the two holding bolts and torque to 22 ft lbs. Repeat with the right hand caliper. If you were unfortunate enough to inadvertantly operate the front brake whilst the calipers were dismounted, you will need to insert a length of metal - probably a hefty screwdriver - between the pads and lever them apart, against the brake action. This is likely to be a tedious process and should be tackled by two people - one to hold the caliper and another to do the levering. Prise the pads apart about 6 or 7mm and then there will be enough space to allow the disc to pass between them as you reattach the caliper to the fork leg. As a final check that everything is secure, lock the steering and with the bike on the centre stand and the front wheel off the ground, grab the tyre at the bottom and give it a good hard wobble left and right. There should be no sound of clinking from the wheel or hub area, and no movement other than very slightly bendy forks. If you can feel a side movement from the wheel, or hear something metallic, you have probably not knocked the axle in quite far enough, so slacken off the 22mm axle nut and the 4 fork-bottom bolts and use a rubber hammer to knock the axle in as far as it will go, then retighten everything. |
|
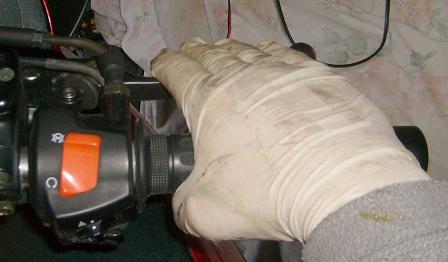 |
Finally, pump the front brake lever to take up any slack in the brake action, and check that the brake light works. Spin the front wheel to check for free rotation. Take the Deau off its jack and centre stand and do a gentle front brakes test down your drive or pathway. If you have had a new tyre, remember that for the first 100 miles or so it won't give you full grip, so don't push your luck on the corners!
|
 the
Red Fox says : "Once the two calipers are removed,
be very careful NOT to operate the front brake lever, or you'll force
the brake pads together and it can be quite a job to get them apart
again."
the
Red Fox says : "Once the two calipers are removed,
be very careful NOT to operate the front brake lever, or you'll force
the brake pads together and it can be quite a job to get them apart
again."