All nut and bolt sizes are quoted as the spanner size required to fit them.
 the
Red Fox says : "I strongly advise you NEVER to use
ANY pattern (non-Honda) parts. The cost savings are minimal and the risks
are huge. Are you going to risk trashing your engine for a couple of Pounds,
Euros, or Dollars?"
Time : expert 10 minutes, average 15 minutes, "first-time" 25 minutes.
All the hands, tools, and bike in the photos are the author's. In some of the photos I have had to wipe my hands clean before using the camera. I am very receptive to comments and suggestions, but you use these pages entirely at your own risk.

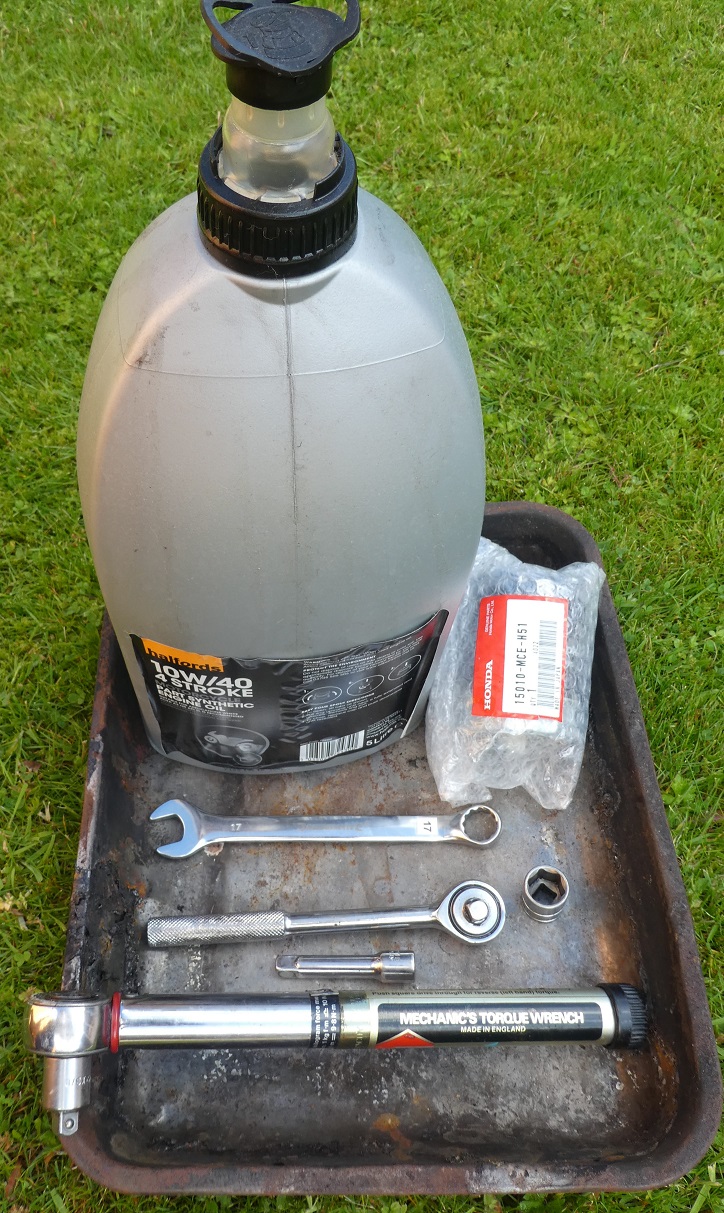

Don't do anything until you have bought the new oil filter and oil. Honda recommend "Good quality SAE 10W/40 engine oil, API class SE, SF or SG [or alphabetically higher rated]". In the example illustrated, I used Halfords part synthetic oil. You will need 2.6 litres of it but I suggest that you buy a 5 litre bottle as you can keep the rest for top-ups later on.
Virtually any semi synthetic oil will do provided it is in the 10w-40 range. You can spend a fortune on so-called specialist oils but by far the most important aspect is regular changes and level checks. Fully synthetic is fine, too.
The genuine Honda part number for both the 650 and 700 Deauville oil filter is 15010-MCE-H51. You can obtain this from your local Honda dealer or direct from David Silver. Silver's list the 700 filter separately, but it is the same part number as the 650 one.
This is the link to the item at David Silver's.
Take the bike for a short run, or allow it to idle for 10 minutes, to warm the engine to normal working temperature. This thins the oil and greatly helps the draining process. Park the bike on its centre stand on a firm surface, turn off the fuel and ignition.
Gilbert Despeghel comments : "I personally always use a small bottle of Engine flush which I add to the old motor oil. Then I ride for some 10 minutes to warm up the oil and then at home, I drain the old oil. In that way, all the mineral contamination will be drained with the oil. Just a recommendation."
I have never done this myself, and Honda don't mention doing it, so I'll leave it up to individual owners to decide whether or not to try this idea. But having said that, the garage who service my car do recommend an occasional engine flush.
Some owners put the bike on its prop (side) stand, to allow better draining. However if you do this, don't forget to put the bike on the centre stand when refilling the engine, to get the correct level of oil.
I recommend using surgical gloves - or barrier cream - on your hands, to prevent contamination from oil or other fluids, and to help keep your hands clean. If one glove gets torn or damaged, discard it and use a new one. They are best bought in boxes of 100 - a useful birthday present from a spouse or biking pal! For spannering jobs, the white latex ones are better than the opaque type. They do sell in different sizes - try one of the stands at your local market, or at a bike show
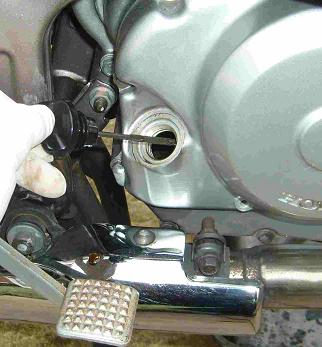
Remove the dipstick to allow air in as the old oil drains out. Be careful where you put down the dipstick. If you stand on it and break it whilst walking round the bike, you won't be able to ride until you have bought a replacement.

The oil drain plug - ringed in yellow on the photo - is situated on the left hand front of the engine casing, underneath the chrome water transfer pipe. As you sit on the bike this would be just in front of and rather lower than your left toe.
Place your drain tray immediately under the drain plug - and rather out to the left, as once the oil starts to come out, it will squirt a little way towards you.
 the
Red Fox says : "I recommend using a patch of ladies'
tights (or nylons) or other fine mesh type material to drain the oil through.
This will immediately show up any engine debris. A few flecks of small
"silver" aluminium particles, or a few fragments of gasket /
sealing compound are ok, but what you really don't want to find is large
pieces of debris, and - horrible! - any coppery or golden coloured flecks.
The latter signifies serious engine problems, almost certainly a failing
or failed big end bearing. If you get coppery or golden flakes, do not
use the engine any more until you have investigated. Unfortunately, big
end failure is usually fatal news for the engine, as repairs are prohibitively
expensive."
the
Red Fox says : "I recommend using a patch of ladies'
tights (or nylons) or other fine mesh type material to drain the oil through.
This will immediately show up any engine debris. A few flecks of small
"silver" aluminium particles, or a few fragments of gasket /
sealing compound are ok, but what you really don't want to find is large
pieces of debris, and - horrible! - any coppery or golden coloured flecks.
The latter signifies serious engine problems, almost certainly a failing
or failed big end bearing. If you get coppery or golden flakes, do not
use the engine any more until you have investigated. Unfortunately, big
end failure is usually fatal news for the engine, as repairs are prohibitively
expensive."Attach your 17mm socket to the extension bar and the extension bar to the ratchet handle - alternatively, use a 17mm ring spanner. DO NOT TRY AND REMOVE THE DRAIN BOLT WITH AN OPEN ENDED SPANNER - it's too tight.
"Undoing" from this angle is anti-clockwise.
Be careful not to catch yourself on the hot exhaust or chrome water transfer pipes.

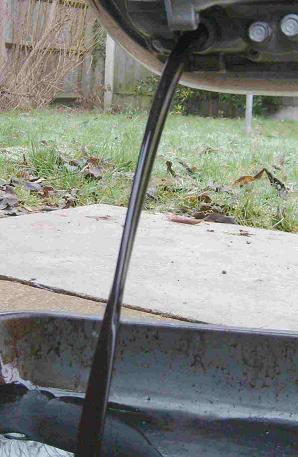
As soon as the spanner has loosened the bolt, unscrew it by hand and remove it. Don't let it fall into the hot oil or you will have to fish it out with a pair of pliers. Oil will start to drain as the bolt is just about to come out - careful - it's hot.
As the last of the oil drains, the spurt will reduce to a trickle, so ensure that your tray can catch any vertically falling drips.
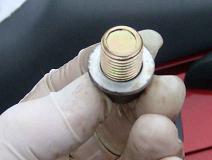
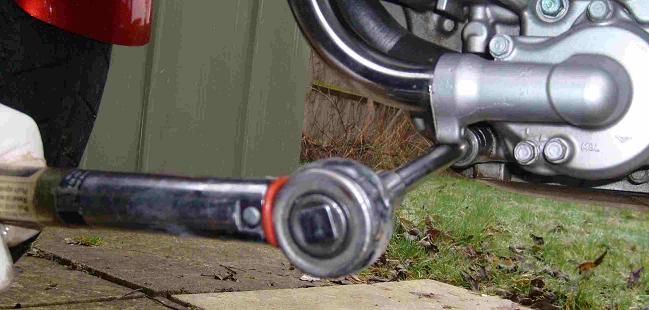
As soon as the oil has completely drained, wipe clean the area where the drain bolt goes into the engine crankcase. Replace the drain bolt, screw it in finger tight (clockwise) and setting your torque wrench to 17 ft/lbs, fully tighten the bolt.
The New Oil Filter
The oil filter is the metal canister type as used on most cars. It screws into the rear of the engine casings just inside of the gear lever and is looks like a black can. The Deauville does not have an oil filter housing like the CX500 or earlier Honda engines.
Move your oil drain tray all the way back to the centre stand and try to unscrew the oil filter by hand - from the rear view, this will be anticlockwise. It may be hot, so be careful. If it comes off by hand, fine, unscrew it all the way off and let any residual oil drain off.
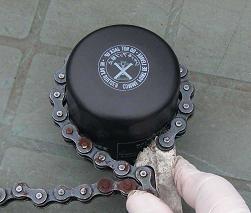
More probably the oil filter canister will be too tight to remove by hand so you will need a strap or chain wrench. This will need to be attached to the old oil filter like the photo opposite.
Slide the strap or chain around the body of the filter, anticlockwise when viewed from the rear, and lock the strap or chain against the tool's handle. In the example chain wrench in the photo, there is a projecting lug over which the chain is lodged. When the tool's handle is pulled anticlockwise to undo the filter, the chain tightens, the teeth of the lug dig into the canister which is then loosened and unscrewed.
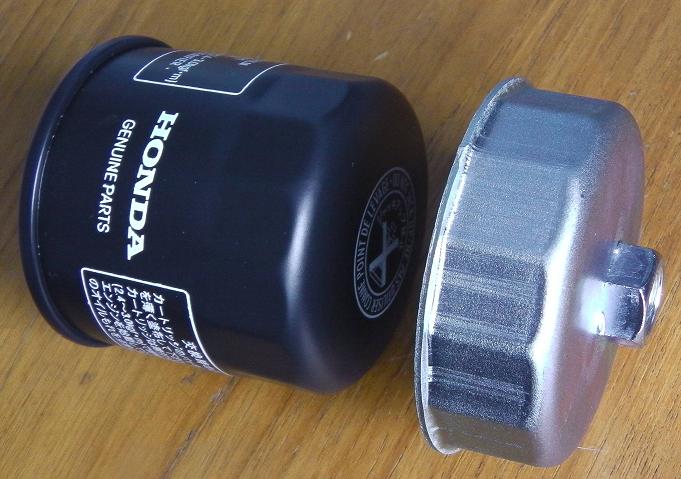
More recently than the above photo was taken, David Silver's have been supplying each new oil filter complete with the bell-shaped removal tool (pictured, left).
This tool fits over the rear of the oil filter and has a 17mm nut on the end, making it easier to loosen and extract the old filter and replace the new one, but you'll need a 17mm ring spanner rather than a socket. There isn't enough room between the 17mm nut and the stand assembly to get a socket on the nut.
However If you are desperate and you don't have the removal tool or a chain or strap wrench, use a screwdriver to punch a hole into the canister and then lever it loose.
As soon as the canister is loose, allow any oil to drain out and then unscrew the canister by hand and discard it. You don't need to keep the rubber oil seal which may come off it.


Before you fit the new filter, use a sharp edge to scribe on it the date and mileage of your bike. If you subsequently forget when you did it, this will remind you (or the subsequent owner).
Shaun
Finlay adds (April 2018) : "I always find it good practice
to 'prime ' the new oil filter by pouring oil into it before fitting.
This alleviates the delay of oil circulating the engine and minimises
any potential engine wear."
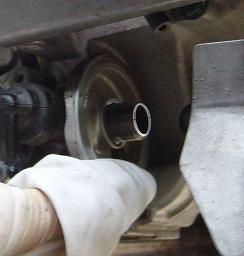
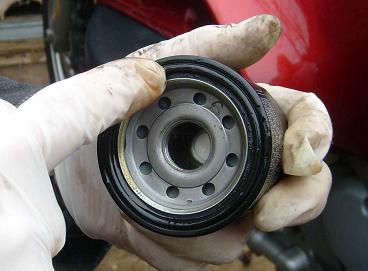
Smear a fingerful of oil over the new filter's rubber seal. This will help it to locate correctly, preventing leaks.
Locate the new filter against its screw boss in the rear engine casing and screw it in all the way, as tight as you can, by hand. If you don't have the removal tool, don't use the strap wrench to tighten the filter as you may damage or even puncture it.
Fill the engine with 2 litres of fresh engine oil and check the dipstick level.
To find the correct oil level, with the Deau on its main stand wipe the dipstick clean, rest it in its hole (without screwing it in) and pull it out. When the oil level is up to the higher of the two marks, the level is correct. Top up the oil as required to reach the correct level and screw the dipstick all the way in, finger tight.
Start the engine and run it gently, without revving it. The red oil warning light on the dashboard should go out within 5 seconds. Allow the engine to idle for 30 seconds and then switch off.
Check the oil level again as it will need to be topped up. New oil will have been pumped around the engine internals, and the sump level will have dropped. Top up as required.
Check under the engine for any drips or weeps and tighten up the drain plug or oil filter as necessary.
Road test and check oil level again.

YOU'RE DONE! Don't pour the old oil down the drain - most council tips have proper facilities for engine oil disposal. It's worth keeping an old 5 litre oil bottle as a repository for your used engine oil; take these down to the council tip and dump the oil in the proper place.
You are welcome to comment- but you must manually remove the extra 'z' from the email address.