Remove saddle.
Remove the rubber protector surrounding the bottom of the fuel tank.
No screws, just pull out the two rubber grommets.
Remove the left hand side cover (no1 in figure 1)
No screws, pull out from bottom to release the prongs from the rubber grommets (x2), then lift upwards to release the tabs at the top (front) and rear.
Remove the left hand middle fairing lid (no 2 in figure 1)
Remove the single crosspoint screw, pull out the single release prong at the lower rear of the fairing, then lift gently releasing the tabs (x3) along the bottom, then slide back to release the tab at the top (rear) and lift off.


Routing the HotGrips wiring
Tip: Place a towel or similar across the tank to prevent any scratches during the following tasks
Route the Oxford HotGrip switch (from bike battery end) and twin wired Hotgrip connectors along LH side under tank and up through the front fork fairing and place on top of the tank.
Place Controller (loosely)
under the middle fairing lid (below the fuel tank) (Figure 2) with the
battery leads and fuse routed towards the battery.
Connect battery (negative first, then positive) terminals to the battery (Figure 3)
Plug ALL of the connectors together, including the grips.
Start the engine and check to ensure that the grips start to warm up.
This is a confirmation check that there are no fault(s) with the grips before continuing with the full install. Ensure the Hotgrips switch is 'turned off' and switch off the ignition.
Assuming everything works,
remove the LH and RH grip plug connectors at the front of the bike.


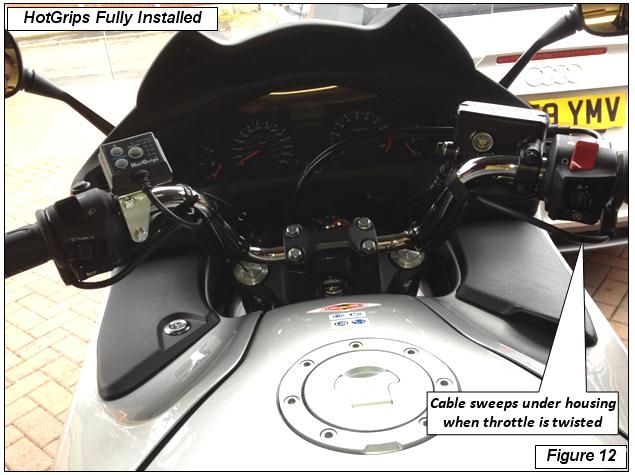
Attached the HotGrips Switch bracket to the clutch clamp, by using the longer bolts provided. (Figure 4)
Tip: Be sure to place the spacer(s) between the clutch clamp and bracket to prevent bending the bracket.
Adjust the clutch clamp to required angle and tighten the bolts.
Use the 'double sided' pad attach the HotGrips switch to the bracket and press firmly (be sure you don't inadvertantly switch on the system)
Check to ensure that there is plenty of cable slack between the Hotgrips switch and the Controller and then attach the 'double sided' pad to the Controller and press firmly onto the plastic shroud under the fuel tank.
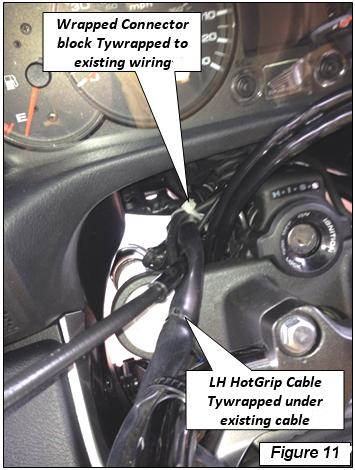
Tidy up the cable routing and wrap insulating tape around all the connections to prevent water ingress and also where any chafing might occur.
Tie wrap the cabling along
the route from the battery through to the front forks.
Fitting the Heated Grips
Remove the handlebar end weights.
Place a screwdriver between the rubber and handlebar and then whilst 'rotating' the screwdriver slowly push it further in until the entire rubber grip has been lifted off the glue seating. (Figure 5)
Tip: Rotating the screwdriver means less likelihood of pushing the blade through the rubber grips and wrecking them so that you can either a) refit them at a later date if you sell the bike and want to keep the heated grips or b) have to send the heated grips off for a warranty issue.
Whilst rotating the screwdriver around the handlebar, pull the original grips off. I found rotating the screwdriver makes it easier.
Clean off the excess glue from the handlebars using glasspaper.
Tip: don't slide the glasspaper by grasping each end as there is a risk that you could damage the finish on the clutch lever housing with the edge of the paper.


Clutch Side Fitting
GENTLY clean off the excess rubber sealant along the join on the inside of the Oxford clutch grip using the round file.
Dry fit the grip first. Apply a small amout of washing up liquid (or similar product) on the handlebar and slide on the Oxford Grip. It may need slight twisting as you go but should not need to be forced on.
Align the grip so the cable exits along the bottom of the handlebar (see figure 4 above). Some prefer the cable to exit across the top; either is fine as it is purely personal preference.
Check the cable clearance between lever, and then move the handlebars to the end stop to check clearance to the tank.
Once the position is confirmed
place masking tape on the clutch housing and mark the position on the
grip (Figure 6). This ensures correct alignment when glueing at the
later stage.
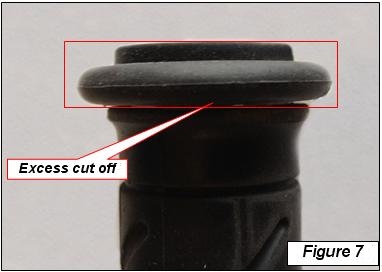
Hold the handlebar end weight back against the bar and check for refit clearance. Remove excess as required with scalpel or Stanley blade to enable a good fit to the handle bar.
I removed the amount shown in Figure 7 to enable the weight to be fully screwed in with a small gap remaining between the heated grips and the end weight. (Figure 8 below).

With a towel or similar protection over the tank and down the sides, apply some of the provided superglue along the top of the handle bar and refit the HotGrip as quickly as possible, twisting as you go and align the marks made at step 25 above.
Tip: only apply
superglue along 3/4 the length of the bar from end as the sliding action
will push the excess along the rest of the bar.
Throttle Side Fitting
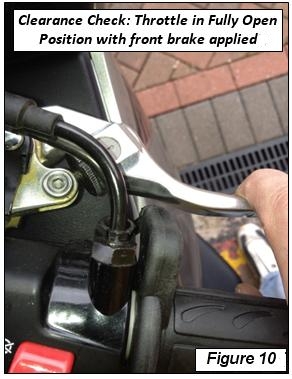
Repeat the steps above, checking throttle clearance as shown in Figure 10 below.
With a towel or similar protection over the tank and down the sides, and depending on how tight your Oxford Grip is, adopt one of the following approaches:-
Loose(ish) Oxford Grip - Apply superglue along the 3/4 of the top of the nylon throttle slider and and refit the HotGrip as quickly as possible, twisting as you go and align the marks made at step 25 above;
Tight(ish) Oxford Grip - Apply superglue along the inner flange on the nylon grip and much less along its length and refit the HotGrip as quickly as possible, twisting as you go and align the marks made in the above instruction.
Tip: My grip
was still tight despite repeated attempts to get it to fit easily, I
ended up sliding the Grip on leaving about 25mm (1 Inch) left to go
and then applied the superglue around the outside edge of the nylon
inner flange and on the inside of the exposed HotGrip before fully pushing
it fully home and aligning the markings.
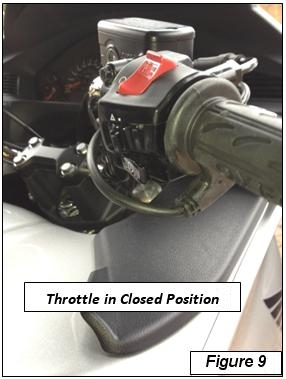
Recheck all clearances to ensure no fouling (Figures, 4, 9 and 10)
Refit handle bar end weights with allen key (note, the weights have a stepped edge and need to be aligned before final tightening).
