Honda
NT650 "Deauville" - Headlight bulb replace
This page shows
you how to remove and replace the headlight bulb on your Deauville motorcycle.
Skill :
2. Tools : 1. Personally dirty : 1. Work mess
: 1. Space : 1. Time : expert 30 minutes, average
45 minutes, "first-time" an hour.
Skill
levels explained. Return to the Deauville
Web Resource
All
nut and bolt sizes are given for the spanner size required to fit them.
Tools : 5mm hex (Allen)
key; crosshead screwdriver; replacement bulb.
This page refers
to a UK specification NT650V4 Deauville and I can't speak for what differences
there might be on other variants. I welcome amplification of any points from
non-UK owners - by all means contact me with a view to providing comparable
photos, which I'll credit accordingly.
 the
Red Fox says, sadly : "After some time of use I have to
add that the front headlight on the 650 Deauville is dreadful and nothing you
stick in the bulb holder can improve this. The problem isn't the wattage of
the bulb - it's the badly designed reflector, which scatters its light over
far too wide an area. Compared to the marvellous headlight on the 1981 CX500,
the Deau's forward illumination is pathetic and not good enough for safe night
riding on unlit roads."
the
Red Fox says, sadly : "After some time of use I have to
add that the front headlight on the 650 Deauville is dreadful and nothing you
stick in the bulb holder can improve this. The problem isn't the wattage of
the bulb - it's the badly designed reflector, which scatters its light over
far too wide an area. Compared to the marvellous headlight on the 1981 CX500,
the Deau's forward illumination is pathetic and not good enough for safe night
riding on unlit roads."
Also,
as I don't ride in daylight with the headlight on, I've since fitted an illuminated
off switch to the dipped beam circuit. This doesn't affect either the sidelights
which are always on, or the highbeam / flasher.
|
The Deauville
in UK guise comes equipped with a 55/60 watt headlight which just about
staggers over the leading edge of the front mudguard and empties itself
a few yards up the road. You can obtain a slight improvement by fitting
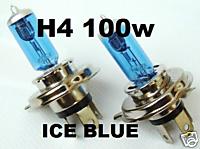
a 100 watt bulb such as the Xenon Ice White/Blue 100w. The electrical
system is perfectly capable of handling this.
I obtained mine
from eBay because I couldn't buy 100 watt H4 bulbs from any garage I visited.
A pair cost me about £10 including postage. 100w bulbs are technically
illegal for road use but I very much doubt that an MoT tester would notice.
I am told that Halfords sell them, but when I asked at my local store
in Telford I was told that they didn't stock any.
|
|
|
|
Park the bike
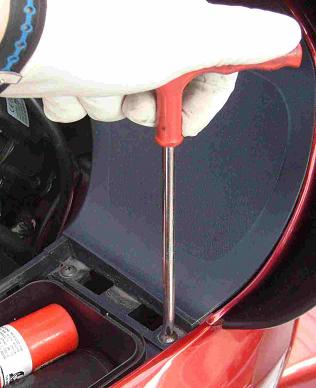
on a secure flat surface and turn off the ignition. Unlock and remove
the right hand glove pocket lid.
Use your crosshead
screwdriver to remove the two fasteners at the bottom end of the lid.
|
|
Use your 5mm
Allen key to remove the top coach bolt holding the right hand dashboard
cover to the fairing, just above the mirror.
|
|
|
|
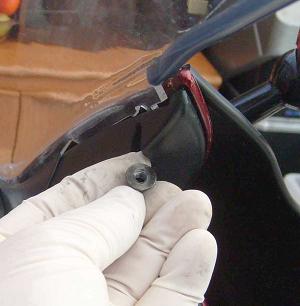
As you undo
this bolt, hold your other hand underneath the corresponding hole inside
the fairing, as there is a small dome nut which will drop out and you
don't really want to lose it!
|
|
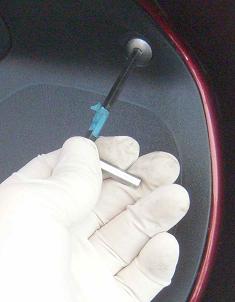
There is another
coach bolt on the rear face of the dashboard cover, this just unscrews.
|
|
|
|
The dashboard
cover is now only held on with rubber stops, gently prise it off and lift
it away. It's reasonably flexible (more so than the rigid side panels)
but take care not to pull it hard and break off one of the rubber grips.
|
|
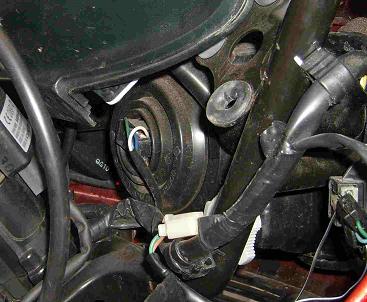
This is the
general view inside the cavity between the rear of the headlight body
and the front of the instrumentation console. There's just enough room
to get your hand in and change the bulb.
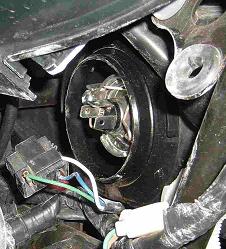
Reach in and
grab the three-colour connector block which is a push fit on the rear
of the headlight bulb. Here you can see that there is a circular rubber
"concertina" which stops water and dirt from entering the headlight
shell.
Pull the connector
block off straight backwards - it's the one with the green, white and
blue wires. If it's stiff, jiggle it to and fro to ease it away. Then
peel off and pull away the concertina, this is a simple push fit on the
headlight shell.
The bulb itself
is secured in place with a thin steel clip which you will be able to see
once the concertina is removed. This clip is released by using a fingertip
to press it forwards and then upwards. It will then pivot to the left,
and you will be able to grip the bulb's rear body and pull it right out
if the headlight shell.
|
|
|
|
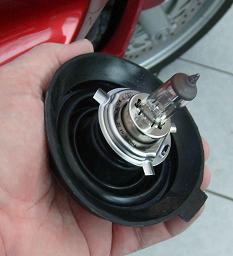
Here you see
the front view the old bulb inserted into the concertina.
|
|
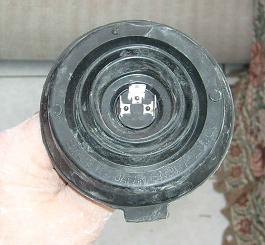
And this is
the rear view. Note the rubber tab is at the bottom, with the three contact
"prongs" at 9, 12 and 3 o'clock.
|
|
|
|
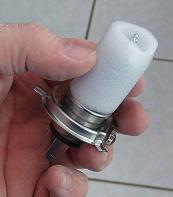
When you handle
a headlight bulb, do not touch the glass surface with your fingers, as
acid on your skin will cause premature failure of the bulb. Keep the protective
wrapping on the bulb until you are ready to fit it, and be extra cautious
with your hands.
|
|
The new bulb
has metal tangs which ensure that it only fits one way, so you can't get
this wrong! Taking care not to touch the new bulb's glass, insert it into
the rear of the headlight shell so that the orientation is as per the
photo opposite.
Remember that
this is UK specification bike. Non-UK variants may be different.
Re-tension the
spring clip across the rear of the bulb, slip the rubber concertina over
the body and push the connector block back on. Now turn on the ignition
and check that the headlight high and low beams are working. Also test
the passing light or headlight flasher button, and that the dashboard
high beam light comes on with the high beam.
If you need
to adjust the height or throw of your headlight beam, you can do so now
- you use the two knurled wheels to adjust how the beam is aimed. The
wheels aren't shown in these photos but they are very obvious when you
look inside the headlight bulb space.
Replace the
dashboard cover and you're done. I recommend that you store a spare H4,
stop/tail and sidelight bulb in the lockable map pocket, or in your tail
cone. A plastic drinks bottle with the upper part cut away makes a rigid
container, and you can wrap the spare bulbs in kitchen paper to keep them
clean. Tape up the bottle's open end with packing or insulating tape.
I use a flip-top plastic tub - actually a redundant paintball ammunition
magazine!
|
|
You are welcome to comment
on these pages but you must manually remove the extra 'z' from the
email address.
|
 the
Red Fox says, sadly : "After some time of use I have to
add that the front headlight on the 650 Deauville is dreadful and nothing you
stick in the bulb holder can improve this. The problem isn't the wattage of
the bulb - it's the badly designed reflector, which scatters its light over
far too wide an area. Compared to the marvellous headlight on the 1981 CX500,
the Deau's forward illumination is pathetic and not good enough for safe night
riding on unlit roads."
the
Red Fox says, sadly : "After some time of use I have to
add that the front headlight on the 650 Deauville is dreadful and nothing you
stick in the bulb holder can improve this. The problem isn't the wattage of
the bulb - it's the badly designed reflector, which scatters its light over
far too wide an area. Compared to the marvellous headlight on the 1981 CX500,
the Deau's forward illumination is pathetic and not good enough for safe night
riding on unlit roads."